This article was co-authored by wikiHow Staff. Our trained team of editors and researchers validate articles for accuracy and comprehensiveness. wikiHow's Content Management Team carefully monitors the work from our editorial staff to ensure that each article is backed by trusted research and meets our high quality standards.
There are 10 references cited in this article, which can be found at the bottom of the page.
This article has been viewed 26,577 times.
Learn more...
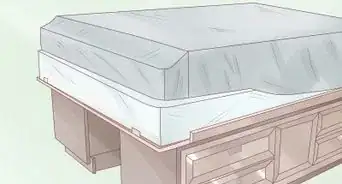
A wall bed, also called a Murphy bed, is a bed that folds up into a cabinet to make more space in a room. Pre-made wall beds are expensive—they can cost several thousand dollars. Building your own, however, costs a fraction of that price. This is a complicated job, but you can do it with some carpentry skills. First, construct the mattress frame and cabinet out of plywood boards and wooden blocks. Then, attach the cabinet to the wall. Use a hardware kit to install the rotating mechanism to lift and lower the bed. Finish up by adding a bed stand and security bolts to hold everything in place.
Steps
Constructing the Mattress Frame
-
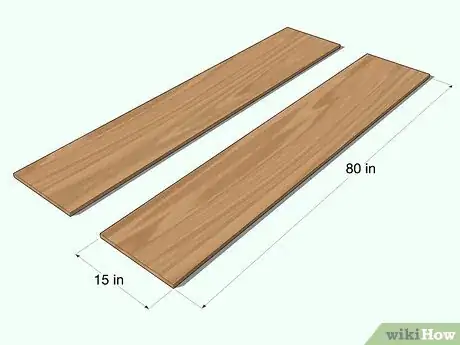
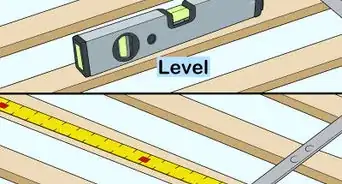
1Cut 2 pieces of plywood 80 in (200 cm) long and 15 in (38 cm) wide. These are the standard dimensions for a queen-sized bed. Use a tape measure or ruler and measure each piece of wood carefully. Then use a straight edge and pencil to mark the lines that you’ll cut. Make sure these lines are perfectly straight before you cut. Then cut straight along each line. These pieces form the side rails for the mattress frame.[1]
- Use either a table saw or circular saw. If you use a circular saw, set up the wood on 2 sawhorses so it stays stable while you measure and cut.
- Whenever you use a saw, wear goggles and gloves. Keep your fingers at least 6 inches (15 cm) away from the blade.
- Remember that these dimensions are for a standard queen-size bed. Always measure the mattress you’re using to get the correct dimensions. Other bed dimensions are:
- King: 80 in (200 cm) long and 76 in (190 cm) wide
- Full: 75 in (190 cm) long and 53 in (130 cm) wide
- Twin: 75 in (190 cm) long and 38 in (97 cm) wide
-
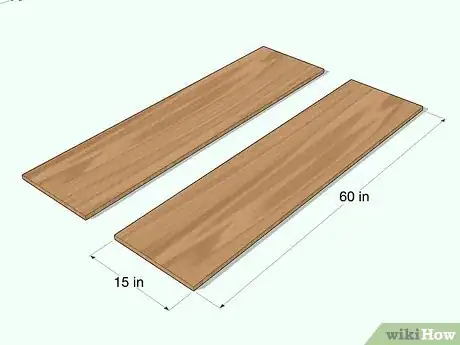
2Cut 2 more pieces of plywood 60 in (150 cm) long and 15 in (38 cm) wide. These pieces form the header and footer of the bed frame. Use the same measuring and cutting techniques to complete the cutting for the frame.[2]Advertisement
-
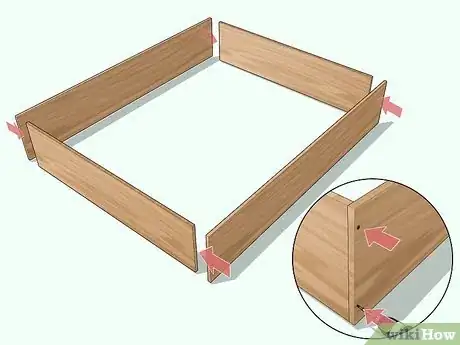
3Screw the 4 sides of the frame together. Lay 1 of the side rails on its edge. Then take the header and overlap it with the edge of the side rail. Drill 2 screws through the header to attach the 2 pieces. Then screw the other side rail to the opposite side of the header. Finally, screw the footer at the bottom of the frame to complete the rectangular bed frame.[3]
- Check and make sure all the edges are even. If not, remove the screws by running the drill in reverse and drill them again.
-
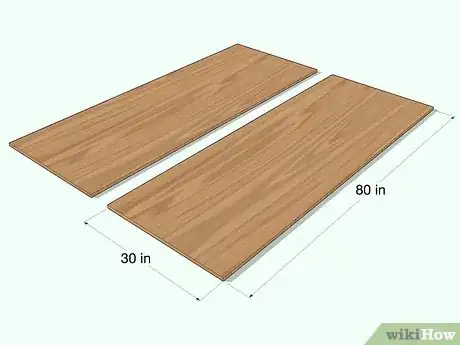
4Cut 2 plywood boards to 30 inches (76 cm) by 80 inches (200 cm). These 2 boards form the base of the mattress frame. Use a straightedge and pencil to measure and mark the cutting lines on each board. Then use your circular saw or table saw to cut these boards to the correct size.[4]
- Standard plywood boards are 48 inches (120 cm) by 96 inches (240 cm). If you’re using a standard board, cut 18 inches (46 cm) from the width and 16 inches (41 cm) from the length.
- Adjust these measurements if you’re building a frame for a different-sized mattress. Make sure the boards cover the same dimensions as the frame.
-
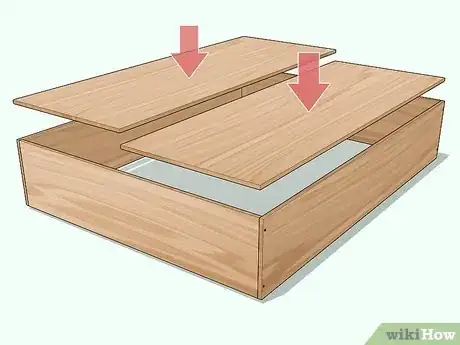
5Lay the boards lengthwise on top of the frame and line up the edges. Line up each board with the corners of the mattress frame. Make sure each board covers half the frame. Line up the board edges with the edges of the frame so everything is even.[5]
- Push the boards together so there is no space between them.
-
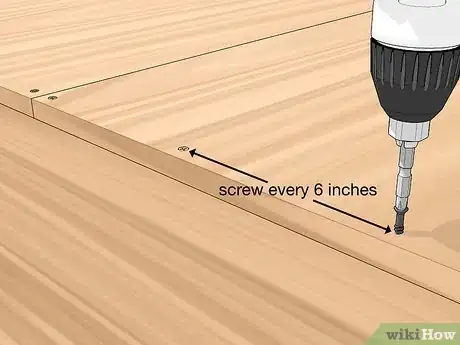
6Drill a screw every 6 inches (15 cm) around the frame border. Drill through the flat boards and into the mattress frame. Work around the whole border and drill screws at this regular interval. Make sure all of the screws go straight into the support frames and don't pierce the sides of the frame. If any do, remove them and drill another screw 1 inch (2.5 cm) away.[6]
- Re-check the board positioning every few screws to make sure the boards didn’t shift. Keep everything even through the whole process.
-
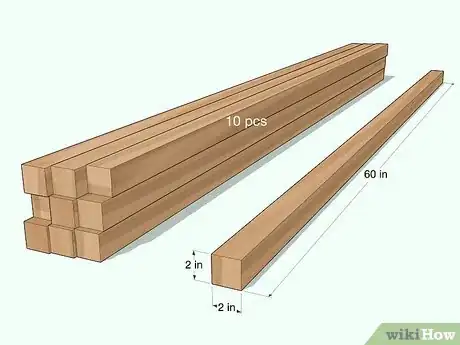
7Cut ten 2 in (5.1 cm) x 2 in (5.1 cm) pieces of wood 60 inches (150 cm) long. These wood strips form the support beams for the bed frame. Cut 2 in (5.1 cm) x 2 in (5.1 cm) strips until you have 10 pieces that are 60 inches (150 cm) long.[7]
- If you can't find 2 x 2 wood blocks, get 2 x 4s and split them in half with a saw.
- Be very careful splitting these pieces of wood. Keep your fingers safely away from the saw blade.
- Cut carefully to ensure that you split a straight line through these wooden blocks.
-
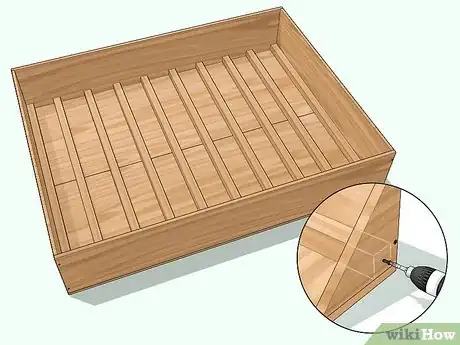
8Drill a horizontal support beam every 10 inches (25 cm) inside the frame. Start by placing one support beam at the far end of the frame. Press it into the frame so it runs alongside the header and touches both sides. Then drill a screw into each end, through the frame and into the support block. Place another support every 10 inches (25 cm) until you reach the other side.[8]
- The support blocks may be a bit too long to fit inside the frame perfectly. If they are, just shave the end until it fits snuggly. Don’t cut too much or it won’t attach securely.
-
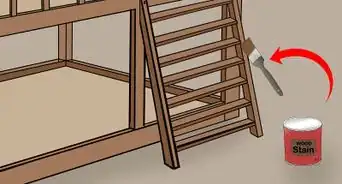
9Paint or stain the wood if you want to. Decorating the bed is up to you. You can leave the wood bare, or color it with stain or paint. If you want to paint, it's much easier to do while the bed is still in pieces. Do all the painting before completing the assembly.[9]
- Paint in a well-ventilated area. Open the window in the room you're working in and use a window fan to pull fumes out of the area.
- Set up a sheet or drop cloth so you don't make a mess with the paint.
- You can always stain or paint the bed later, after you've assembled the whole thing.
Building the Cabinet
-
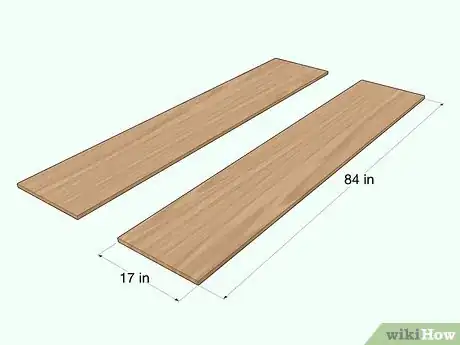
1Cut 2 pieces of plywood to 84 inches (210 cm) by 17 inches (43 cm). These boards form the vertical supports for the bed frame. Measure and cut these boards the same as you cut the boards before. Work slowly and carefully to make sure all your boards are the correct length.[10]
- These measurements are designed for a homemade queen wall bed. If you’re using a kit or pre-made plan, follow those measurements instead.
- If you have a lot of room to work, you may want to assemble the cabinet in the room you’re placing the bed. This is easier than transporting the whole cabinet. Remember that this is a big job, so only work in the installation room if you have enough room.
-
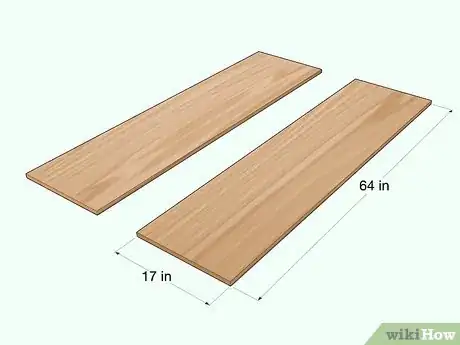
2Cut 2 more pieces of plywood to 64 in (160 cm) by 17 in (43 cm). These boards form the horizontal supports of the cabinet. Use a straightedge and pencil to draw straight cutting lines onto the wood. Then saw along the lines.[11]
-
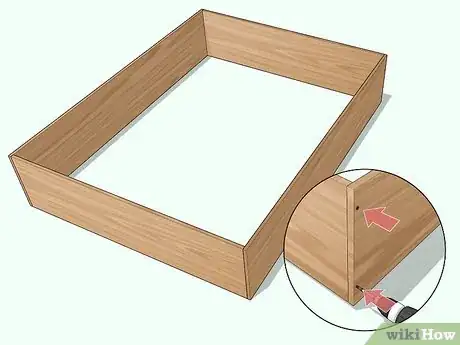
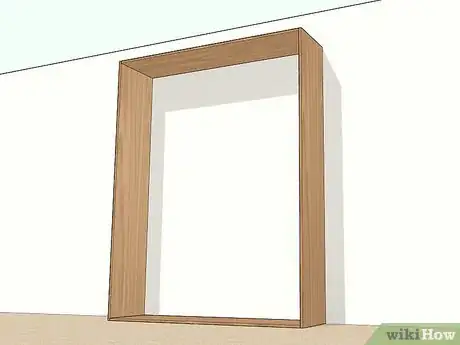
3Attach the 4 pieces of plywood together. Once you’ve cut the 4 boards to form the cabinet, join them together to complete the frame. Lay 1 of the verticals on its edge. Then overlap its edge with 1 of the horizontal pieces. Drill 2 screws through the horizontal piece to connect the pieces. Do the same with the other 2 boards to complete the rectangular cabinet.[12]
-
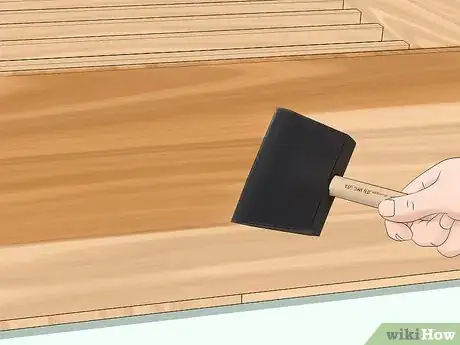
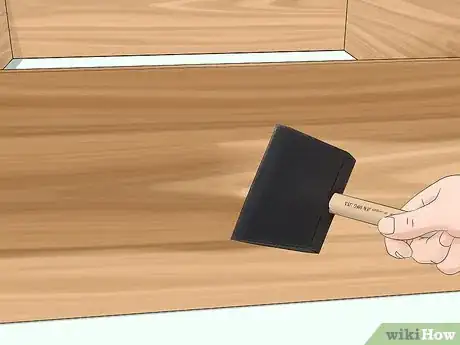
4Paint or stain the wood if you want to. If you want to decorate the cabinet, then apply any stain or paint that you’d like. If you already painted the bed frame, make sure you match the colors.[13]
- Wear gloves and goggles while you’re painting. Work in a well-ventilated area or open a window in the room you’re working in.
-
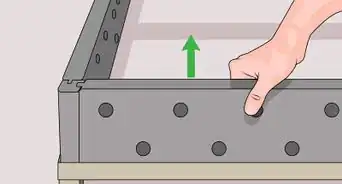
5Move the cabinet into the area that you’re going to install the bed in. This is much easier with 2 people. Either lift the cabinet with a partner or put a sheet down and slide it along the floor. Then stand the cabinet up along the wall that you’re installing the bed in.[14]
Installing the Hardware
-
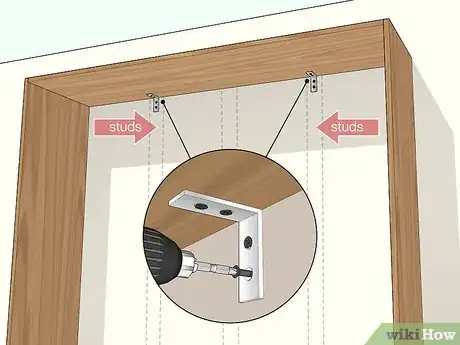
1Attach the cabinet to the wall with 2 L-brackets. Press the cabinet against the wall as close as you can. Find 2 studs in the wall near the center of the cabinet. Arrange the cabinet so the 2 studs are evenly-spaced inside the cabinet. Then take 1 L-bracket and screw 1 side into the stud and the other side into the top support of the cabinet. Do the same for the other L-bracket.[15]
- L-brackets are available at hardware stores or online.
- Studs are usually 16 inches (41 cm) or 24 inches (61 cm) apart. If the studs in your wall are 16 inches (41 cm) apart, find the next stud instead to space out the L-brackets.[16]
-
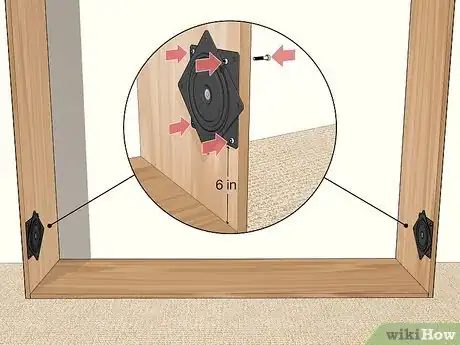
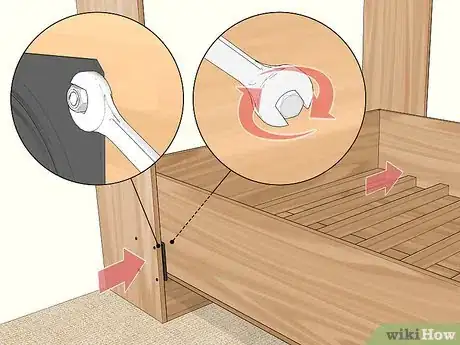
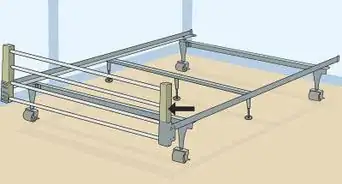
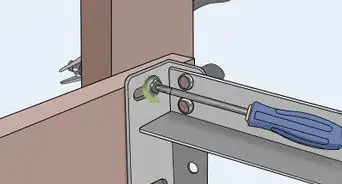
2Fasten the rotating brackets to the inside of the cabinet 6 inches (15 cm) from the floor. Most rotating mechanisms have 4 holes for that fasten to the cabinet. Hold the piece against the cabinet 6 inches (15 cm) from the bottom and even with the cabinet’s front edge. Then drill a hole into the wood through each hole in the bracket. Insert the bolts that came with the bracket and secure them with nuts. Do the same for the other side of the cabinet.[17]
- Tighten each bolt with a wrench to make sure it’s secure.
- There are many different kinds of hardware kits for Murphy beds, so follow the specific directions on the product you use.
- The distance you install the rotating mechanism from the bottom also depends on the particular kit you use. Follow the provided instructions to install the pieces correctly.
-
3Screw the mattress frame to the rotating mechanism. Slide the mattress frame into the cabinet so the header lines up with the rotating brackets. Lift the frame by its header and line it up with the brackets on each side of the cabinet. Drill into the frame using the bracket holes as guidance. Then insert the bolts from your kit into each hole and secure them with nuts.[18]
- For easier installation, prop up the frame with wood while you work. That way the frame will stay stable while you install the brackets.
- Remember that the specific instructions depend on the hardware kit you’re using. Follow those directions for proper installation.
-
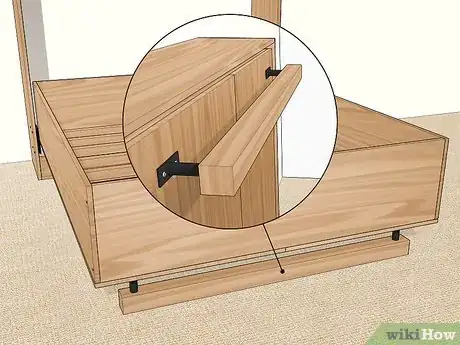
4Attach the stand to the mattress frame. Hardware kits also come with a stand that supports the bed when it’s in the down position. Take the stand in your kit and center it on the footer of the mattress frame. Drill through the holes on the stand and install the bolts and nuts to attach the stand.[19]
- Test the stand by letting the bed stay in the down position and see if it supports the weight of the mattress. For a more realistic test, try laying in the bed and make sure it holds a person’s weight.
- Some stands loop over the mattress when they’re closed and some tuck under the mattress. Refer to your instruction manual for the correct storage position.
-
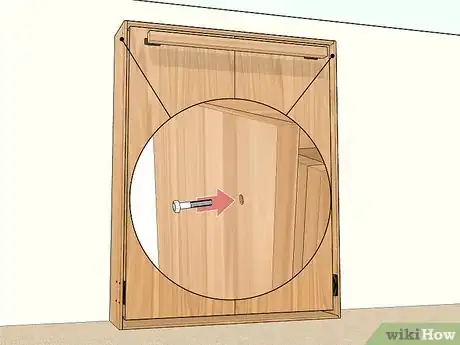
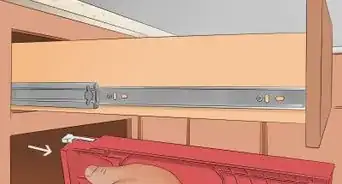
5Drill 2 in (5.1 cm) bolts through the cabinet to keep the bed closed. Close the bed and have someone else hold it shut. Then drill a hole through the cabinet and mattress frame just below the footer of the bed. Insert a 2 in (5.1 cm) bolt to work as a latch and keep the bed up while it’s closed. Repeat the process for the other side.[20]
- Do this step before you put a mattress on the bed to prevent drilling into the mattress.
- Hold the bed frame while you remove the bolts so the bed doesn’t suddenly drop down while you’re opening it.
-
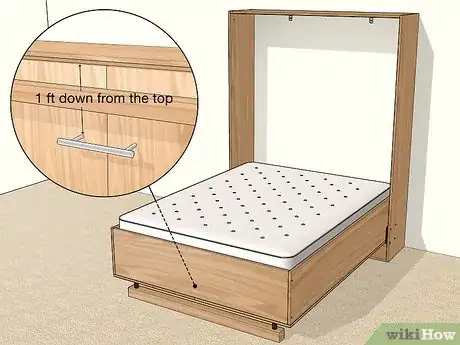
6Install a handle on the front of the bed. Finally, complete this job with a handle to pull the bed open with. Install the handle 1 foot (0.30 m) down from the top of the cabinet so you can pull the bed down. The hardware kit you use may come with a handle. Otherwise, simply drill a piece of wood to the front of the cabinet to use as a makeshift handle.[21]
- If you’re installing shelves on the front of the cabinet to hide the bed, these can work as handles. No need to install a separate handle in this case.
Things You'll Need
- 4 ft (1.2 m) x 8 ft (2.4 m) plywood boards
- 2 in (5.1 cm) x 4 in (10 cm) wood blocks
- Murphy bed hardware kit
- Power drill
- Table or circular saw
- Screws
- Goggles
- Gloves
- Tape measure
- Pencil
References
- ↑ https://www.dimensions.guide/element/queen-beds
- ↑ https://youtu.be/1biz8_60Aeg?t=124
- ↑ https://www.bobvila.com/articles/diy-murphy-bed/
- ↑ https://www.bobvila.com/articles/diy-murphy-bed/
- ↑ https://www.bobvila.com/articles/diy-murphy-bed/
- ↑ https://www.bobvila.com/articles/diy-murphy-bed/
- ↑ https://youtu.be/Y6T1xPC-Iek?t=183
- ↑ https://youtu.be/Y6T1xPC-Iek?t=183
- ↑ https://youtu.be/1biz8_60Aeg?t=950
- ↑ https://www.bobvila.com/articles/diy-murphy-bed/
- ↑ https://www.bobvila.com/articles/diy-murphy-bed/
- ↑ https://www.bobvila.com/articles/diy-murphy-bed/
- ↑ https://youtu.be/1biz8_60Aeg?t=950
- ↑ https://youtu.be/7nOZvUPZqGU?t=499
- ↑ https://youtu.be/7nOZvUPZqGU?t=593
- ↑ https://www.thisoldhouse.com/ideas/stud-spacing
- ↑ https://youtu.be/7nOZvUPZqGU?t=593
- ↑ https://youtu.be/Y6T1xPC-Iek?t=387
- ↑ https://youtu.be/1biz8_60Aeg?t=950
- ↑ https://youtu.be/7nOZvUPZqGU?t=613
- ↑ https://www.bobvila.com/articles/diy-murphy-bed/
