This article was co-authored by Agustin Renoj. Agustin Renoj is a Home Improvement Specialist with Renoj Handyman based in the San Francisco Bay Area. With over 18 years of construction experience, Agustin specializes in carpentry, painting, and exterior, interior, kitchen, and bathroom renovations. Renoj Handyman is a family-owned business that consists of craftsmen trained in all areas of construction.
There are 8 references cited in this article, which can be found at the bottom of the page.
This article has been viewed 316,213 times.
Building a retaining wall will help reduce erosion, improve water drainage, and create usable garden space. It's a great home-improvement project that can be completed in a weekend whether you're a novice or an old hand. The following is a guide that will help you build your own retainer wall, tips and tricks, along with professional-grade guidance.
Steps
Prepping Your Building Site
-
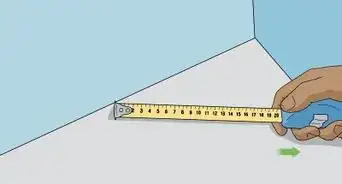
1Plan and layout the site. Plan where your retaining wall is going to be using stakes and string, leveling off to ensure an even height and using a tape measure to ensure an even length.[1]
- Contact your local utilities office to confirm that there are no pipes or cables in your digging zone. Your local utilities office should perform this free of charge.
- If you live in the USA, you must make an 811 “Digline” call and set up a time to have your property inspected to determine the location of underground utility pipes and cables before starting any digging project. This is required by law. Make the call at least a few days before you plan to start your project.
- If you want more of a random outline, lay out a line for your wall using a garden hose. Simply drape the garden hose out in the general area of the proposed wall utilizing its curves. Check to see that the shape is buildable and aesthetically pleasing, and then use landscaping paint or flour to mark the ground where the garden hose was.
-
2Excavate the site. Using a shovel, dig a trench along the line you have laid out. It should be slightly wider than the blocks you will use for your wall, or about 1 foot (30 cm).[2] Check that the trench is as level as possible.[3]
- If you live in the USA, you must wait until the Digline locate process is complete before you begin excavating.
- Enough space should be made to bury the bottom row of blocks at least 1 inch (2.54 cm) for every 8 inches (20.32 cm) of wall height. Factor into this equation a level of paver base that will rest on the bottom of the trench.
Advertisement -
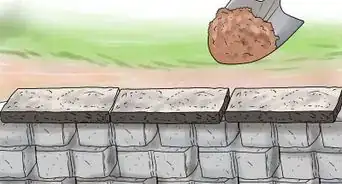
3Tamp the soil level and lay down a paver base. Using a soil tamper — you can easily rent one for less than $20 — tamp (pack) down the bottom of the trench. Then, add 4 to 6 inches (10.16-15.24 cm) of patio paver base or rock dust to the bottom of the trench. Patio paver base is ideal because it is specially made gravel that compacts well and is sturdy.
- Rake the paver base once it's been applied, getting as much uniform coverage as possible.
- Go over the paver base one more time with a level, making sure that the trench area is a uniform height. If there's uneven distribution add a little more or take away some paver base by raking.
- Tamp the bottom of the trench again, compacting the base a final time.


Laying the Foundation
-
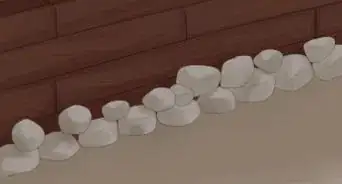
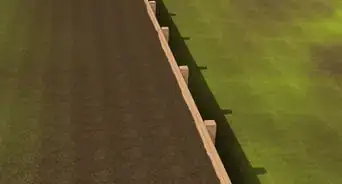
1Begin by laying the foundation. These are the most critical blocks in your wall. If they aren't level or adequately support the top half of your retaining wall, the whole project is going to look less than professional. Make sure that the foundational blocks are leveled off, sturdy, and tightly packed together.[4]
-
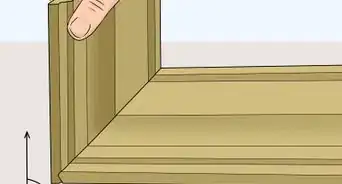
2Start at the most visible edge of the wall. Add gravel or crushed rock to level the stone, if necessary. Add the first block to the trench, using a cornerstone. Make sure it is level from front to back and side to side.[5]
- Alternately, if there's no edge to the wall that is more visible than another, start at the edge that will be closest to another structure (usually a house).
- If you're building a straight or rectangular retaining wall, make sure that the backs of the blocks line up with one another perfectly; if you're building a curved retaining wall, make sure that the fronts of the blocks line up with one another perfectly.
-
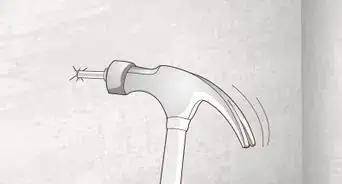
3Cut off the top tongue of the base stones, if necessary. Some contractors prefer cutting off the top tongue or groove from the base stones before laying them down. Check for sturdiness yourself and knock the tongue off the block with a hammer and chisel, if necessary.
- Understand that curved retaining walls with tongues may not benefit from the interlocking grooves. These grooves will need to be cut off with a hammer and chisel if the layout of the pattern does not fit the direction of the grooves.
-
4Use coarse sand and a rubber mallet to level off the first layer of blocks. This will complete the entire foundation. If you took the time to level off the bed, laying the first row should be easy. Use coarse sand where necessary to get a level finish on your foundation. Hammer the blocks down with your rubber mallet.[6]
-
5Cut individual blocks to complete the first layer, if necessary. Simply mark them at the appropriate length and cut with a mason's saw. Always use proper protection when cutting.
-
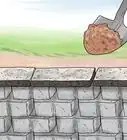
6Use crushed stone or gravel for backfill on your first layer of blocks. This will provide excellent support, keeping your bottom layer from slipping back with time and erosion.[7]
-
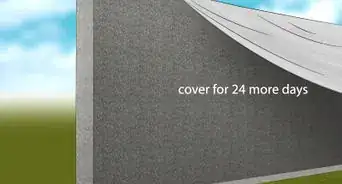
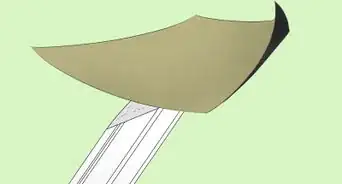
7Place a filter fabric over the backfill. This will prevent frost heave and keeps the soil from mixing with the backfill. Depending on how tall your retaining wall is, you may want to drape the filler along the back side of the trench or house, fill the trench with backfill until it's anchored the filter fabric down, and then drape the fabric flat out, on top of the backfill.
-
8Sweep the first layer with a broom. This will free up any dirt or dust.


Completing the Wall
-
1Start your second layer with a staggered pattern. This is so that the top layer seams are offset with the bottom layer. You want each layer of blocks to be different from the one below it. For example, if the wall has straight edges on the ends, the next layer should start with a block that has been cut in half.
- Place the blocks onto the foundation before applying the adhesive. See how they look; ask yourself whether you need to make any significant cuts before gluing . Lay out one whole row before moving on to the next step.
- If you're working with blocks that have flanged tongues, simply line up the female groove of the top block with the male groove of the bottom block.
-
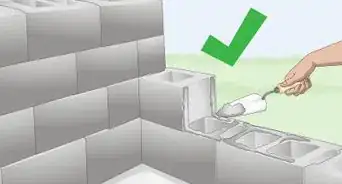
2Apply the recommended adhesive to the bottom blocks, once a layer has been provisionally laid out. Next, fit the top block overhead. Press down to make sure that each layer is secured tightly against the layer beneath it. Continue until retaining wall is its preferred height.[8]
- If your wall is over 3 ft (.91 m) in height, you should offset each new row slightly back from the row below it, like very shallow stair steps. This will make your wall more stable and help create a better hold with the soil once you backfill.
-
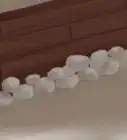
3Add drainage pipes to your retaining wall, if the wall is 2 feet (60 cm) or taller. Look for a perforated pipe and lay it down the length of the retaining wall, covering it up with breathable backfill.
- Make sure water can drain out of your pipe, either at the ends or through an outlet in the middle of the wall.
-
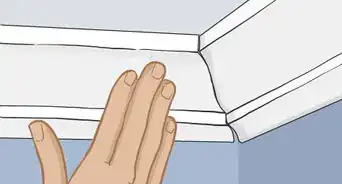
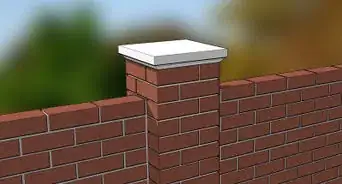
4Add topper stones, if desired. Topper stones usually come in rectangular shapes, making them more difficult to install in curved retaining walls. If you need to cut topper stones to fit the curve in your retaining wall, follow this trick:[9]
- Lay stones #1 and #3 out in their pattern.
- Lay stone #2 on top of #1 and #3, drawing lines on #1 and #3 where stone #2 overlaps them.
- Cut stones #1 and #3 along those lines.
- Line up #1 and #3 into place, snugging #2 in between.
- Repeat, placing stone #4 on top of stones #3 and #5.
-
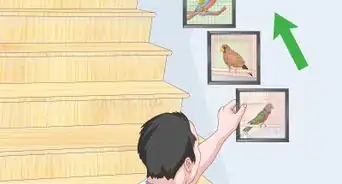
5Place topsoil in the basin created by the retaining wall. Add plants, vines, or flowers as necessary. Your retaining wall is ready to be enjoyed.


Expert Q&A
Did you know you can get expert answers for this article?
Unlock expert answers by supporting wikiHow
-
QuestionDo I need drainage behind a retaining wall?
 Agustin RenojAgustin Renoj is a Home Improvement Specialist with Renoj Handyman based in the San Francisco Bay Area. With over 18 years of construction experience, Agustin specializes in carpentry, painting, and exterior, interior, kitchen, and bathroom renovations. Renoj Handyman is a family-owned business that consists of craftsmen trained in all areas of construction.
Home Improvement SpecialistYes, you need drainage for water, or else the pressure could build up and eventually push the wall over.
Support wikiHow by unlocking this expert answer.
-
QuestionWhen creating a retaining wall made of brick is it necessary to use mortar?
 Anthony "TC" WilliamsAnthony "TC" Williams is a Professional Landscaper in Idaho. He is the President and Founder of Aqua Conservation Landscape & Irrigation, an Idaho Registered Landscape Business Entity. With over 21 years of landscaping experience, TC has worked on projects such as the Idaho Botanical Garden in Boise, Idaho. He is a Idaho Registered Contractor and a previously Licensed Irrigator in the State of Texas.
Experienced LandscaperIf using small, standard bricks and bigger bricks/blocks, and/or if the wall is over 3 ft in height, then using mortar is best practice.Support wikiHow by unlocking this expert answer.
-
QuestionWhat are the regulations for building a retaining wall holding a neighbors land?Anthony "TC" WilliamsAnthony "TC" Williams is a Professional Landscaper in Idaho. He is the President and Founder of Aqua Conservation Landscape & Irrigation, an Idaho Registered Landscape Business Entity. With over 21 years of landscaping experience, TC has worked on projects such as the Idaho Botanical Garden in Boise, Idaho. He is a Idaho Registered Contractor and a previously Licensed Irrigator in the State of Texas.
Experienced LandscaperRegulations for building on neighbour's properties changes according to local ordinances. I recommend checking with your city government.Support wikiHow by unlocking this expert answer.
Things You'll Need
- Garden hose
- Landscaping paint or flour
- Shovel
- Retainer wall blocks
- Soil tamper
- Gravel or rock dust
- Hammer
- Two wooden stakes
- String
- Topper stones (optional)
- Landscape fabric
- Topsoil
- Brick chisel
- Sledgehammer
- Coarse sand

References
- ↑ https://www.bobvila.com/articles/building-retaining-walls/
- ↑ Agustin Renoj. Home Improvement Specialist. Expert Interview. 13 January 2021.
- ↑ https://www.bobvila.com/articles/building-retaining-walls/
- ↑ https://www.lowes.com/n/how-to/build-a-block-retaining-wall
- ↑ https://www.lowes.com/n/how-to/build-a-block-retaining-wall
- ↑ https://www.youtube.com/watch?v=LfVOPqztUmQ
- ↑ https://www.youtube.com/watch?v=LfVOPqztUmQ
- ↑ https://www.thisoldhouse.com/how-to/how-to-build-retaining-wall
- ↑ https://www.todayshomeowner.com/how-to-cut-and-install-retaining-wall-topper-stones/
About This Article

To build a retaining wall, begin by planning and marking out where you want your wall to be. Dig a trench, then tamp down the soil and lay a base layer of rock dust. Lay the foundation on this base and use a rubber mallet to level the blocks. To avoid mistakes, lay out a staggered pattern of blocks ahead of time, then assemble them again using adhesive when you’re sure you have it right. When you’re done, you can add topper stones or include plantings behind your retaining wall. To learn more from our Professional Landscaper co-author, like how to cut the blocks if you need to, keep reading the article!