X
wikiHow is a “wiki,” similar to Wikipedia, which means that many of our articles are co-written by multiple authors. To create this article, 20 people, some anonymous, worked to edit and improve it over time.
This article has been viewed 65,258 times.
Learn more...
Pen Drives are used all over the world, and they have a wide variety of uses. While you can buy a Pen Drive on the cheap these days, building it yourself can save you some money, and allow you to customize it to your liking. This article will teach you how to build a pen drive.
Steps
Part 1
Part 1 of 3:
Building the Pen Drive
-
1Protect your work surface. Spread a cloth or a newspaper to avoid leaving marks.
-
2Acquire a flash memory chip. There are many such chips available. This chip will be the heart of your Pen Drive.Advertisement
-
3Use a Drill to cut the plastic to the right size, depending on your chip. Make sure that the combined size of both does not exceed the maximum size of a standard USB Connector.
- It is a good idea to wear goggles while doing this, as drill bits and flashing can fly.
-
4Align the plastic case and the chip. Cut off any excess plastic. Remember to maintain absolute precision.
-
5Glue the plastic to the chip, keeping the chip connector side down, so as not to cover it up.
- Avoid using normal glue or superglue, this can leave stains on your work area and might mess up the components. Use a glue made to glue plastics together.
-
6Join the two components firmly using a vice, clamp, or just by pressing them together between your palms. Be very careful not to mess up the alignment.
-
7Wait for the glue to dry. Leave your Pen Drive for a while as the glue dries. Keep it under a fan to help it dry faster.


Advertisement
Part 2
Part 2 of 3:
Decorating and Designing the Pen Drive
-
1Measure the USB connector. Leave a 2 centimeter (0.8 in) gap starting from the front of the pen drive, making sure not to cover the connector. It is better to leave more gap than less gap, as your pen drive may not go in at all if improperly designed.
-
2Draw a rough dividing line, dividing the pen drive into two parts, head and body. The head of the pen drive is the part that plugs into the computer, whereas the body stays outside and can be decorated. Use the measurement you made in the previous step to facilitate this task.
-
3Remember to only decorate the body. All the steps below should be applied only to the body of the pen drive.
-
4Encase the pen drive. This is not necessary, but can go a long way toward protecting your pen drive from mechanical damage. It also makes it look better. This should be done only to the body! Follow the steps below to encase the pen drive:
- Lay the pen drive on your work surface, and measure its dimensions.
- Drill a hole of the dimensions of the pen drive into a slab of plastic.
- Cut out any excess plastic, leaving a border around the hole.
- Place the pen drive in the hole and use some glue to lock it in place, if necessary.
-
5Paint the pen drive in your favourite colours.
-
6Decorate it! This is up to your imagination. Here are some ideas:
- Put the pen drive in a 3D case
- Add a tag or a hole to it to use it as a keychain.
- Add some papier mache, or glitter.


Advertisement
Part 3
Part 3 of 3:
Setting Up the Pen Drive
-
1Decide what you want to use the pen drive for. Pen drives have a wide variety of uses, and some of them are given below:
- Bootable OS Drive
- Simple Flash Memory Drive
- Portable App Drive
- System Restore Drive
- Ram Drive
- Encrypted Data Drive
- System Unlock Key
-
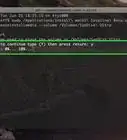
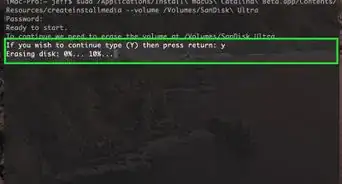
2Load the necessary software on your pen drive. If you want to use it as a bootable drive, you will need to install a bootable image of an OS (Often Linux) on it.
-
3Finished.


Advertisement
Community Q&A
-
QuestionHow do I sell a pen drive?
 Community AnswerSell it online on a site such as eBay.
 -
QuestionHow do I install software from a USB stick?
 Community AnswerYou can connect your USB to a computer, then connect your pen drive. You will be able to see any associated files from the USB on your computer and install software from there.
 -
QuestionHow do I use a memory card in a pen drive?
 Community AnswerPlug a card reader into the pen drive and then you can read the memory card.
Advertisement
Warnings
- If you're under 18, it is a good idea to call in an adult to help you with the cutting and grinding.⧼thumbs_response⧽
- Loose drill bits can fly! Exercise caution while drilling.⧼thumbs_response⧽
- Wearing thick clothes while working can prevent injury.⧼thumbs_response⧽
Advertisement
Things You'll Need
- Flash Memory Chip
- Drill
- Block of plastic
- Glue
- Cloth
- Paper


About This Article
Advertisement