This article was co-authored by wikiHow Staff. Our trained team of editors and researchers validate articles for accuracy and comprehensiveness. wikiHow's Content Management Team carefully monitors the work from our editorial staff to ensure that each article is backed by trusted research and meets our high quality standards.
This article has been viewed 90,994 times.
Learn more...
Building a blimp, whether as a science fair project or just as a way to spend an afternoon, is a fun do-it-yourself activity that anybody of almost any age can enjoy. Blimps are relatively simple flying machines; they use a gas that is lighter than air, such as helium, in order to be able to float, while using motored propellers on a bottom structure to move forwards and backwards. By building your own blimp bag out of mylar, filling it with helium, and attaching it to a motorized bottom, you can construct your own relatively inexpensive indoor blimp.
Steps
Building the Blimp Bag
-
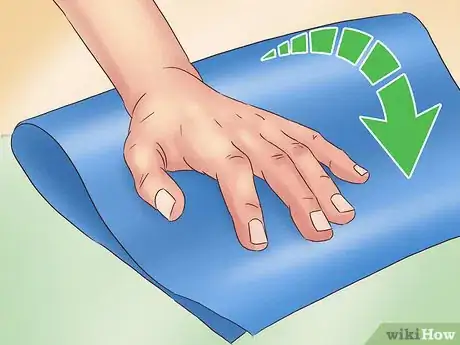
1Fold, cut, and rub the bag material. Fold your mylar or other bag material over so that the shiny side faces outward. Have the top layer overlap the bottom by 33 inches (84 cm) and cut away extra bag material so that your bag is 33 inches (84 cm) by 38 inches (97 cm). Finally, rub the folded bag material with a terry cloth towel to remove wrinkles and any trapped air.
- You can make your bag out of mylar or latex; however, mylar is more malleable and thus can be made into a more aerodynamic shape than latex can. You can buy a mylar blanket from a camping or sporting goods store.
- If you don’t want to build your own blimp bag, you can also buy a mylar balloon off the shelf. Just make sure it meets the dimensions above.
-
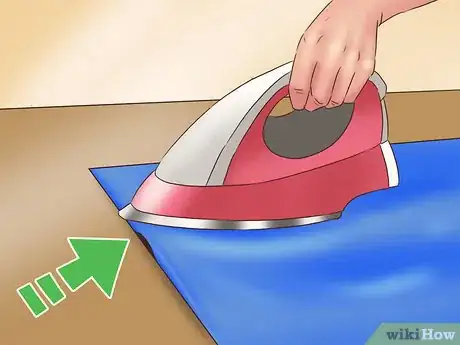
2Iron seams along the sides of the bag, leaving space for a fill spout. Mark a bottom border 32 inches (81 cm) from the top fold line with a yardstick and felt tip pen. Place the yardstick along the left side of the material, leaving .5 inches (1.3 cm) of room. Iron a seam alongside the yardstick with a continuous sweeping motion.
- Repeat this process for the right and bottom sides of the material, making sure to leave room for a fill spout the size of a plastic drinking straw in the bottom left corner.
- When you’re finished, flip the bag over and repeat this ironing process on the opposite side.
- Place 2 pieces of clear packing tape along the sides of the fill spout. The tape gives the fill spout extra protection.
Advertisement -
3Test the blimp bag for holes or leaks. Insert a drinking straw into the fill spout and fill the blimp bag partway with air. Tape the spout to seal it, then leave the bag alone for 1 hour. If its size remains the same after an hour, it has no leaks.
- If you have a leak, locate it by shining a light on one side of the balloon and looking through the other side to look for light shining through. Make sure you do this in a darkened room.[1]
- You can patch holes in the balloon with adhesive tape or remove the air from the bag and redo any seams that are leaking.
- Remove all the air from the balloon before repairing any leaks that are more than .25 inches (0.64 cm) in diameter.[2]
-
4Fill the blimp bag with helium from a helium tank. Once you’ve made sure your balloon bag has no leaks, it’s time to inflate it. Place the fill spout on the nozzle of the helium tank and hold it firmly with one hand. With the other hand, press on the nozzle to release helium into the balloon. Once the balloon is sufficiently filled, tape the fill spout closed.[3]
- You only need to fill the bag with enough helium for it to start floating. Don’t feel compelled to inflate it to the greatest possible extent.
- You can buy a helium tank for filling balloons at many balloon and party shops. If you’d rather not buy a tank, take your bag to a balloon shop and have them fill it for you.
Assembling the Lower Half
-
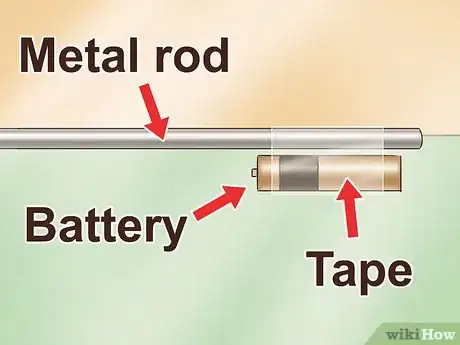
1Create a battery mount on a metal rod. Attach one piece of Scotch tape to half of another, sticky side to sticky side, leaving a non-stick area at least as long the circumference of your battery. Attach this piece of combined tape perpendicularly near the front end of your rod and fold it closed, leaving a loop that is big enough for the battery to slide in and out.[4]
- You should place this loop roughly ¼ of the way from the aft side of the rod.
-
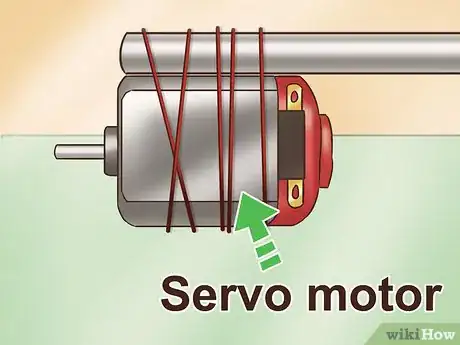
2Attach a motor and propeller to the front of the rod. Use elastic bands to attach your servo motor to the front end of the rod. Make sure it is directed forward (in the direction of motion) and attach your propeller to it. Once you’re comfortable with the positioning, lock the motor in place with superglue.[5]
- After it’s locked in place, use leads to attach the motor to the battery.
-
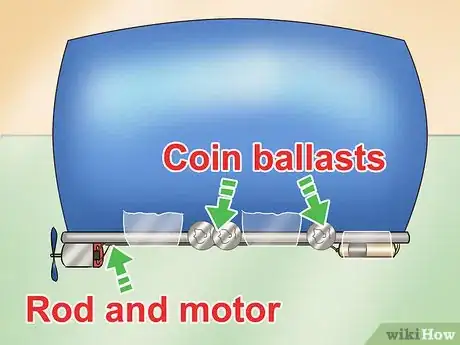
3Tape the rod and ballast to the balloon. Use 2 pieces of Scotch tape to attach the rod to the bottom of the balloon bag, making sure to maintain the integrity of the wiring. Then, use Scotch tape to attach some ballast (e.g., a couple of small coins) to the bottom of the blimp so that it will descend when it isn’t powered.[6]
-
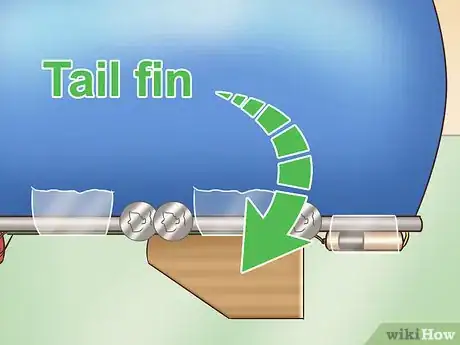
4Add a tail fin to make your blimp fly smoothly. Having tail fin on your blimp will ensure it flies in a straight direction. Attach a small piece of cardboard or Depron to the rear of the blimp using 2 pieces of Scotch tape.[7]
- Attach your tail fin to hang downward in order to help protect your propeller from hitting the floor.
- To make sure your blimp will still float, hold it in the air after you’ve attached the tail fin and carefully loosen your grip until you’re no longer holding on to it. If it doesn’t stay buoyant, you’ll need to reduce the weight of the fin.
-
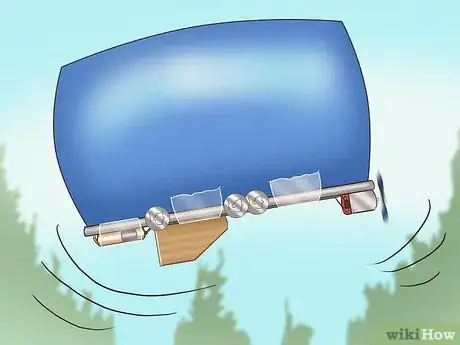
5Flip the power switch on your motor to start your blimp. Once your blimp is fully assembled and you’ve made sure it’s buoyant, it’s ready to fly. Holding the blimp in the air, turn on the motors that your batteries are connected to to start the propellers. Then, gradually loosen your grip until you’re no longer holding on to it and watch it fly.[8]
Community Q&A
-
QuestionHow do I build a real blimp that real people can fly in?
 Community AnswerCheck your local and state laws regarding aerospace vehicles and FAA and EAA for blueprints and advice. Draw up a plan and purchase the required materials and tools, helium cylinders for balloons or propane, or get a furnace lightweight enough to take on board to provide lift. Check your parachute and take off.
 -
QuestionCan I use normal air instead of helium when building a blimp?
 Community AnswerYou can, but it won't fly. The helium is less dense than air in a room, causing the blimp to rise when helium is added. If you use normal air from the room the blimp will inflate, but it will not rise.
 -
QuestionWhat can I use the blimp for?
 99 KillianCommunity AnswerA blimp is a safer, slower version of a plane. If a motor fails, the blimp fill not crash land. But since blimps use helium, they are very expensive.
Warnings
- Do not fly blimps with metalized nylon blimp bags into power lines. Doing so could cause a severe power outage.⧼thumbs_response⧽
Things You'll Need
- Mylar or latex
- Yardstick
- Scissors
- Terry cloth towel
- Felt tip pen
- Iron
- Packing tape
- Helium tank
- Scotch tape
- Metal rod
- 70 mAh LiPo battery
- Leads
- Electric motor
- Propeller
- Tail fin
References
- ↑ http://www.blimpguys.com/serviceRepair.htm
- ↑ http://www.blimpguys.com/serviceRepair.htm
- ↑ https://www.birthdayinabox.com/pages/how-to-inflate-a-helium-balloon
- ↑ https://www.popsci.com/diy/article/2012-06/remote-control-airship-instructions-and-parts#page-3
- ↑ https://www.popsci.com/diy/article/2012-06/remote-control-airship-instructions-and-parts#page-3
- ↑ https://www.popsci.com/diy/article/2012-06/remote-control-airship-instructions-and-parts#page-3
- ↑ https://www.popsci.com/diy/article/2012-06/remote-control-airship-instructions-and-parts#page-3
- ↑ https://www.popsci.com/diy/article/2012-06/remote-control-airship-instructions-and-parts
