This article was co-authored by Jillian Fae Downing and by wikiHow staff writer, Danielle Blinka, MA, MPA. Jillian Fae Downing is a Private Event Chef, Chef Educator, and the Owner of Jillian Fae Chef Services based out of Temecula, California. With 12 years of experience, she specializes in menu planning and menu research and development. Jillian Fae holds an Associate of Science in Culinary Arts from Orange Coast College and a BA in Mass Communication and Media Studies from Arizona State University. She is also a member of the American Culinary Federation and the American Personal and Private Chef Association.
wikiHow marks an article as reader-approved once it receives enough positive feedback. This article has 14 testimonials from our readers, earning it our reader-approved status.
This article has been viewed 2,561,811 times.
Boiling chicken breast is an easy way to add healthy protein to your meals. You can boil the chicken plain or season your water for added flavor. The key is to let the chicken breast boil for long enough that it cooks all the way through and isn't pink on the inside. Once your chicken is cooked, you can serve it whole, chop it up, or shred it.
Ingredients
- Chicken breast
- Water
- Vegetable or chicken broth (optional)
- Chopped onions, carrots, and celery (optional)
- Herbs (optional)
- Salt and pepper
Steps
Putting the Chicken in a Pot
-
1Skip rinsing the chicken breasts before you cook them. You may have been taught to rinse chicken before you cook it, but doing so can spread harmful germs and bacteria around your kitchen. As you rinse the chicken, water droplets splash off of it, causing bacteria to splatter all over your sink, countertops, arms, and clothes. It’s best to avoid washing chicken so that you don’t risk food poisoning.[1]
- Chicken carries harmful bacteria, like salmonella. It only takes a tiny amount of germs to make you sick, so don’t risk it.
- If you'd like to debone your chicken breasts, run a boning knife as close to the bone as you can without removing too much of the chicken breast flesh. The bone only usually covers about half of the chicken breast.[2]
-
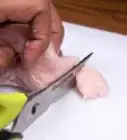
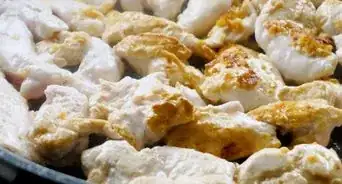
2Cut the chicken into halves, quarters, or cubes to help it cook faster. This step is optional, but it can dramatically reduce your cook time. Use a sharp knife to slice through the chicken breasts, cutting them into smaller pieces. Chop them as small as you like, depending on the dish you’re making.[3]
- If you’re shredding the chicken, you might not want to chop them too small, as this could make shredding take longer. However, it might be helpful to make your pieces very small if you’re adding them to a salad or wrap.
- Use a cutting board that’s dedicated to chopping meat to limit the risk of contaminating other foods. Bacteria like salmonella can get stuck onto your chopping board, even if you wash it. If you then chop veggies on the board, they might get contaminated with salmonella.
- Whole pieces of chicken take up to 30 minutes to cook, while small pieces may cook as quickly as 10 minutes.
Advertisement -
3Place the chicken into a medium or large pot. Put the chicken into the pot first, then add the water or broth afterwards. Arrange the chicken in the bottom of the pan in a single layer.[4]
- If you have to layer the chicken to make it all fit, then it’s best to switch to a bigger pot. Otherwise, your chicken may not cook as well.
-
4Cover the chicken with water or broth. Slowly pour water or broth over your chicken, being careful not to splash. Add just enough water to completely cover the chicken.[5]
- If the water boils off, you can add more water, as necessary.
- Keep in mind that splashing can distribute bacteria like salmonella.
- You can use either chicken or vegetable broth.
-
5Season the pot using spices, herbs, or chopped veggies, if you like. Adding seasonings is optional, but it can make your chicken much more flavorful. At a minimum, add salt and pepper to your water for a little seasoning. However, it’s best to also add dried herbs like italian seasoning, jerk seasoning, or rosemary. For really flavorful chicken, chop up onions, carrots, and celery, then add them to your water.[6]
- After you cook the chicken, you can save the water or broth for use in another recipe, if you like. For instance, it might make a good soup stock.
- If any veggies are sticking out of the water, add more water so that the veggies and chicken are totally covered.
- Sprinkle in some spices like chili powder, cumin, and garlic. Dried herbs are also great, along with spice blends from different manufacturers.
-
6Cover the pot with a lid. Use a lid that fits tightly onto the pot you’re using. This will seal in the water vapor that evaporates from the pot to help the chicken cook.[7]
- When you lift the lid, use a towel or pot holder so you don’t burn your hand. Additionally, don’t hold your face over the pot, as the steam could burn you.


Cooking the Chicken
-
1Bring the water or broth to a boil over medium-high heat. Place the pot on a stove burner and turn the heat to medium-high. Watch the pot until it starts burning, which will take a few minutes. Watch for bubbles on the surface of the water and condensation forming on the lid, which mean the water is boiling.[8]
- Don’t let your water or broth boil too long, as this can evaporate too much of your liquid. Stay with the pot so you can turn it down as soon as it starts boiling.
-
2Turn the heat down to a simmer. The chicken will continue cooking at a simmer. Turn the heat down to low, then monitor it for a few minutes to make sure the water or broth is lightly simmering.[9]
- Don't leave the pot unattended, even while it's at a simmer. You don't want it to accidentally start boiling again or for the water to evaporate.
-
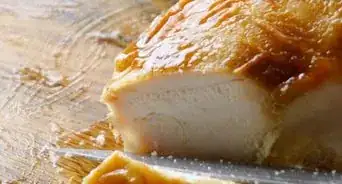
3Check the chicken breasts with a meat thermometer after 10 minutes. Remove the lid from the pot. Next, pull out a single piece of chicken from the side of the pot. Push your meat thermometer into the center of the chicken, then read the temperature. If it’s not at least 165 °F (74 °C), put the chicken back in the pot, replace the lid, and keep cooking it.[10]
- If you don’t have a meat thermometer, cut the chicken in half to see if it’s pink inside. While this is not as accurate as a meat thermometer, it will help you determine if your chicken is likely done.
- Large pieces of chicken will likely not be ready at this point. However, smaller chunks or chicken quarters may be cooked.
- Overcooking your chicken will make it rubbery and unpleasant to chew, so it’s best to check if it’s ready, even if you suspect it isn’t.
-
4Continue cooking the chicken until it reaches 165 °F (74 °C) inside it. If the chicken isn’t ready after 10 minutes, keep cooking it. Check it every 5-10 minutes to see if it’s done. How long it will take for your chicken to cook depends on the size of the pieces:[11]
- Chicken breasts with skin and bones should cook for about 30 minutes.
- Skinless, boneless chicken breasts should cook for 20-25 minutes. If they are cut in half, then they’ll likely take 15-20 minutes.
- Skinless, boneless chicken breasts that have been cut into 2-inch pieces should cook for about 10 minutes.
- When the chicken is thoroughly cooked, the inside will no longer be pink.
-
5Remove the pot from the heat. Turn off the burner, then use a towel or pot holder to grasp the handle on the pot so that you don’t burn yourself. Move the pot to a cool burner or a pot cooling rack.[12]
- Be careful when handling the hot pot, as you might burn yourself.


Serving or Shredding Your Chicken
-
1Drain the liquid from the pot. Slowly pour the water or broth over a colander, being careful not to splash. The chicken and any veggies you used to flavor the water will collect in the colander for easy retrieval. Set the colander on a clean countertop, then either discard or save the liquid.[13]
- If you’re planning to save the liquid for a future recipe, drain it into a clean bowl. From there, you can refrigerate or freeze it.
- If you used veggies to season your water, discard them into your compost or trash.
- As an alternative, you can use a fork, slotted spoon, or tongs to remove the chicken.
-
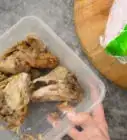
2Transfer the chicken breasts to a plate. Use a fork to move the chicken from the colander to a plate. Be careful not to touch the chicken, as it will be very hot.[14]
- If you prefer, you can transfer the chicken back into the empty pot. For instance, you might prefer to shred the chicken in the pot if you plan to add a sauce to it. That way, you can warm the sauce in the same pan you used to cook the chicken.
-
3Let the chicken rest for 10 minutes before you use it. This gives the chicken a chance to cool down before you handle it. Set a timer and leave the chicken alone during this time. Afterwards, you can serve or shred your chicken.[15]
- If you’re planning to add a sauce to the chicken, it’s okay to do so now as long as you don’t touch the chicken. However, don’t heat up the sauce until the chicken has cooled for 10 minutes. This will help you prevent the chicken from becoming rubbery from overcooking.
-
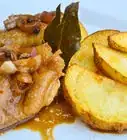
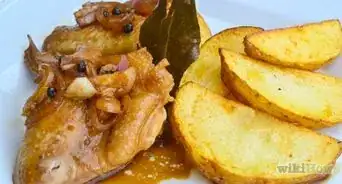
4Serve the chicken whole or cut it into chunks. After your chicken cools, you can serve it however you like. It’s okay to eat the breasts whole, or you might want to slice them up.[16]
- If you like, you can season your chicken with more spices or a sauce. For instance, you might coat it in barbeque sauce or mix it into a mango salsa.
- You can add boiled chicken to salads, stir-fries, or fajitas.
-
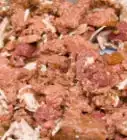
5Shred the chicken with 2 forks if you’re making tacos or sandwiches. Hold a fork in each hand, then use the forks to pull the chicken apart. Continue to pierce and pull apart the chicken until it’s shredded to your preferences. Then, you can use it to complete your recipe.[17]
- You can also use a knife to help break up the chicken, if you prefer.


Community Q&A
-
QuestionCan I bake the chicken after I boil? It if so, how long do I bake it?
 Community AnswerYou don't need to bake the chicken after boiling it. It should be fully cooked.
 -
QuestionHow long should I boil it if I want to put on the grill?
 Community AnswerYou don't need to boil it if you are going to grill it.
 -
QuestionCan chicken be brought to a boil, switched off, and allowed to stay in the liquid until cold?Community AnswerYes, this is the only way I make my boiled chicken, as it stays juicer and you don't burn your fingers pulling it apart.
Warnings
- Be sure to wash your hands both before and after handling chicken to prevent the spread of salmonella. Wash or disinfect any knives, forks, plates, and counter-tops that touch raw chicken.⧼thumbs_response⧽
- Chicken can safely be stored in the refrigerator for up to 2 days. If you don't plan on eating it within that time, then store it in the freezer.[19]⧼thumbs_response⧽
Things You'll Need
- Pot
- Water
- Broth (optional)
- Cutting board
- Chicken
- Spices (optional)
- Chopped veggies (optional)
References
- ↑ https://www.livescience.com/50919-why-washing-chicken-before-cooking-is-unsafe.html
- ↑ https://www.cooksillustrated.com/how_tos/8229-boning-a-split-chicken-breast
- ↑ https://www.delish.com/cooking/a22826207/how-to-boil-chicken/
- ↑ https://www.bhg.com/recipes/chicken/breasts/how-to-boil-chicken/
- ↑ https://www.bhg.com/recipes/chicken/breasts/how-to-boil-chicken/
- ↑ https://www.delish.com/cooking/a22826207/how-to-boil-chicken/
- ↑ https://www.bhg.com/recipes/chicken/breasts/how-to-boil-chicken/
- ↑ https://www.bhg.com/recipes/chicken/breasts/how-to-boil-chicken/
- ↑ https://www.delish.com/cooking/a22826207/how-to-boil-chicken/
- ↑ https://www.delish.com/cooking/a22826207/how-to-boil-chicken/
- ↑ https://www.bhg.com/recipes/chicken/breasts/how-to-boil-chicken/
- ↑ https://www.delish.com/cooking/a22826207/how-to-boil-chicken/
- ↑ https://www.bhg.com/recipes/chicken/breasts/how-to-boil-chicken/
- ↑ https://www.bhg.com/recipes/chicken/breasts/how-to-boil-chicken/
- ↑ https://www.delish.com/cooking/a22826207/how-to-boil-chicken/
- ↑ https://www.bhg.com/recipes/chicken/breasts/how-to-boil-chicken/
- ↑ https://www.bhg.com/recipes/chicken/breasts/how-to-boil-chicken/
- ↑ https://www.bhg.com/recipes/chicken/breasts/how-to-boil-chicken/
- ↑ https://www.foodsafety.gov/keep/charts/storagetimes.html
About This Article

To boil chicken breasts, put the defrosted meat into a large pot and add water until it's completely submerged. Next, put the lid on the pot and bring the water to a boil over medium-high heat. Then, reduce the heat to a simmer and let the chicken cook for about 15 minutes. You can check to see if the meat is cooked through by carefully removing a piece and cutting into it. If it's still pink in the middle, continue simmering the breasts in 5-10 minute increments. Once the chicken is cooked through, remove it from the heat and drain the liquid from the pot. To learn how to boil a chicken breast with seasonings and flavored broths, scroll down!