This article was co-authored by Marie Lin. Marie Lin is a Licensed Pet Groomer and the Owner of Marie's Pet Grooming, a grooming salon based in New York City. Marie has over 10 years of pet grooming experience specializing in dogs and cats. She earned her pet grooming certification from the American Academy of Pet Grooming New York in 2009 and is also a member of the National Dog Groomers Association of America. She earned a Master of Business Administration (MBA) from Hawaii Pacific University in 2007.
There are 9 references cited in this article, which can be found at the bottom of the page.
This article has been viewed 28,650 times.
After washing your dog it is natural that you’ll try to dry them off as well. You can use a towel or let them air dry. However, a hair dryer will complete the job in the shortest time with the least fuss. Purchase a pet-safe dryer and then familiarize yourself with using it. When you dry your dog you’ll want to move quickly, engaging both of your hands to expose the undercoat to air. Offer praise and treats as you finish up.
Steps
Choosing the Right Dryer
-
1Consider a fluff dryer. This type of dryer sits on a stand and can be used for hands-free drying. You can hook up attachments to the base and these will allow you to target the airflow to certain areas of your dog. They also use adjustable heat, which you can change via a knob on the dryer base. This is a good choice if you want to move quickly through the drying process while being cautious of your dog’s face and other sensitive areas.[1]
-
2Consider a force dryer. This is a dryer that uses sheer force to remove water from your dog’s coat. Placing the nozzle close to your dog’s skin will allow the air to push the water off and away. These dryers sound like a lot to handle but they do not use a heating element, which takes some of the challenge away. This is a good choice if you want the quickest option without the risk of burning.[2]
- You can dry your dog in only a few minutes with this model as compared to hour plus with a human-hair dryer. However, be prepared to get wet as the water removed tends to go everywhere.
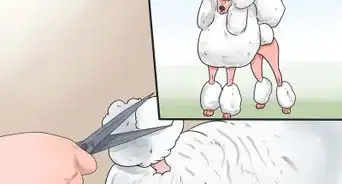
- This is an ideal dryer to use if you plan to cut your dog’s hair afterwards. The force of the air removes kinks from a coat, leaving it straight and ready to cut. Excess shedding hair is also blown away.
Advertisement -
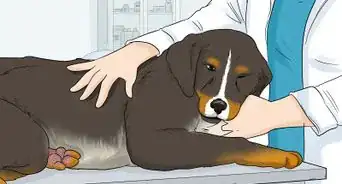
3Consider a cage or cabinet dryer. This type of dryer pushes a low airflow stream into an animal’s cage. It has variable heat and speed settings, although the highest airflow setting is still quite a bit less than a force dyer. This is a good idea if your dog is a bit skittish or nervous during the grooming process. It is also a less stressful way to dry off dogs with a medical condition.[3]
- As the airflow is rather minimal this approach works best with dogs that have short or medium length coats. Make sure to check on the drying process every few minutes to make sure that your dog is comfortable.
- Very old and very young dogs also respond well to this drying approach. You can also try a mixed method by using a force dryer for your dog’s body and then finishing the process (drying off the facial area) with a cage dryer.[4]
-
4Look for a strong CFM rating. The CFM rating tells you the number of cubic feet of air that the dryer will push out per minute. The CFM can be found on the outside of the dryer box or in the online listing materials. You’ll want a high CFW especially if you plan on grooming a dog with a thicker or longer coat.[5]
-
5Comparison shop for brands. There are many dryer options available for both professional and home users. Go online to grooming websites and read reviews and examine rankings. Look for those models that test high in both usability and durability. In many cases you can find a solid dryer for less than $100. [6]
- You can always use a ‘human’ hair dryer on your dog. However, be aware that the process will take longer and you run a higher risk of exposing your dog to heat and causing burns. Just be very careful if you decide to go that route and keep the nozzle of the dryer at least a few inches from the dog’s skin.
-
6Think about buying a warranty. Drying a dog can sometimes be a bit chaotic, especially early on. Getting a warranty can protect you in the event that you accidentally drop the main dryer or if your dog chews on the dryer hose. Balance out risk versus reward when making your decision.[7]


Completing the Drying Process
-
1Towel dry first. After your dog is finished bathing, get a large dry towel and gently soak up the water. It is best to place the towel over your dog’s fur and then press and squeeze different sections of the fur to remove water from the surface and undercoat. Think of it almost like applying a fluffy squeegee to your dog.[8]
- Avoid aggressively rubbing your dog with the towel as that will only create additional tangles in the fur.
-
2Turn your dryer to the proper setting. If the heat is adjustable, start at a warm setting and monitor your dog’s reaction. If needed, you can always turn it down to cool. For the speed, it is best to begin at a slow speed to keep your dog relaxed.[9]
- If your dog is calm, you can raise the speed setting, if you'd like. However, avoid turning up the heat—you don't want to burn your dog's skin.
-
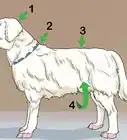
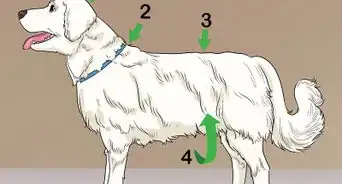
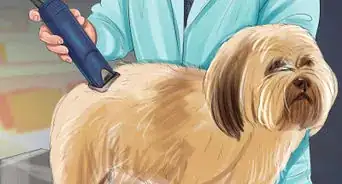
3Start by blow drying the hind area. Bursts of air to the face can startle even the calmest dog. Instead, aim your blow dryer toward the rear of your dog. This feeling is less scary and can almost resemble a relaxing massage, if done carefully and calmly.[10]
- Once you get the back of the dog dry, work your way forward.[11]
-
4Stay in motion. Make progress drying your dog from the hind quarters and moving up toward the neck and face area. Keep your dyer nozzle in constant motion so that you avoid concentrating hot or cool air in any one spot. Staying moving will also allow you to fluff up the fur, speeding up the drying process as well.[12]
-
5Use the “cool” button sparingly. If you use the cool setting, make sure that the room is reasonably warm. Otherwise you run the risk of giving your dog a cold as they sit in a chilly room getting cold air blown on them. The cool button is best used as quick measure against overheating.[13]
-
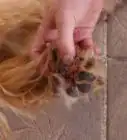
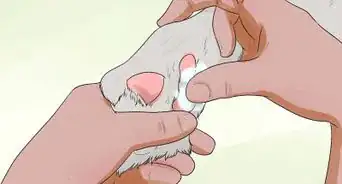
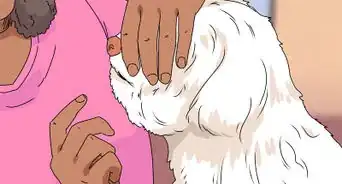
6Skim your hands through the fur. Start by moving your hands against the grain of the fur as this will help to expose the undercoat for drying. Keep one hand free to comb through the hair as the other one guides the nozzle. When you are almost finished drying do a quick once over with your hands combing with the grain to smooth down the fur.[14]
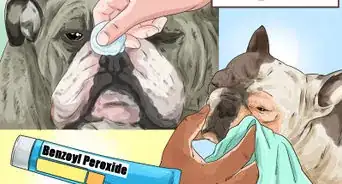
- This is also a good time to keep a look out for any skin rashes or other problems that are visible with the undercoat pushed aside. Consult your veterinarian if you see anything concerning.[15]
-
7You will also want to use your free hand to guide long hair in the direction of the air flow. This will prevent the hair from spinning around and creating heavy “whip knots.”[16]
-
8Leave their coat slightly damp. You are finished with the drying process when you can run your hand over your dog’s coat and only get slightly wet. If you continue to dry your dog then you will risk damaging the hair and making it brittle.[17]
- Make sure to keep your dog indoors until they are fully dry. If they go outside, dirt will stick to their damp coat.[18]
-
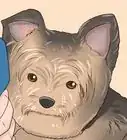
9Comb and style. After your dog is good and dry you can run through their coat with a thicker brush or a fine tooth comb. If you want a long, parted look it is best if you start right behind their nose and then comb your way backwards and along their spine. A quick spritz with conditioner will hold many styles in place, at least temporarily.[19]


Creating a Good Experience for Your Dog
-
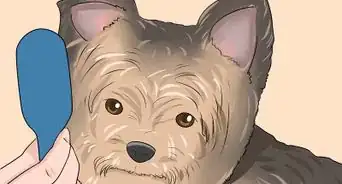
1Get your dog used to the dryer. As with any potentially scary object, it is best if you introduce the dryer slowly. Lay the dryer on the ground (turned off) and let your dog approach it. Give him treats and praise after each inspection. After a while, turn the dryer on and face the nozzle away from your dog. Let him approach and inspect it once more, again following with treats.[20]
-
2Monitor the temperature. Any time that the dryer is on, make sure to keep an eye on the temperature. You want to be particularly concerned about the heat and any possible burns although the cold can prove uncomfortable as well. Too high of a temp can even cause overheating or a skin rash.[21]
-
3Blow in short increments, if necessary. With a skittish or anxious dog it may be best to draw out the drying process. Try to cover about 25% of the coat at a time before taking a quick break. Use these breaks as an opportunity to praise your dog. Keep going until the process is done. Over time, hopefully, you can cut out these short breaks entirely.[22]
-
4Provide ample treats and encouragement. From start to finish make sure to give out healthy treats to your dog to encourage their continued good behavior. Recognize that it may be difficult for them to stand still to be dried. Also, provide verbal and physical praise as well.[23]
- You might say, “Good job!” Or, you could occasionally pat your dog’s head too.
-
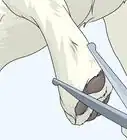
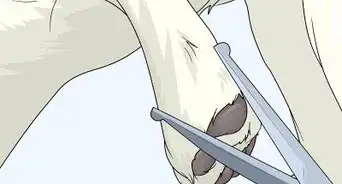
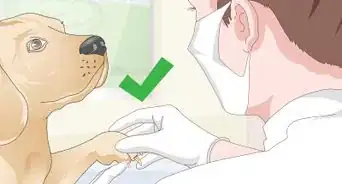
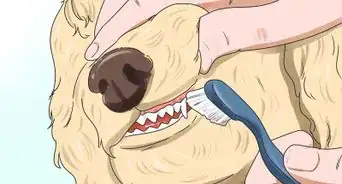
5Avoid the sensitive areas. It is important to place your dog’s safety and comfort over your desire to dry them perfectly. Always hand or air dry the areas directly around your dog’s eyes, nose, and mouth. Shooting a stream of air into these area may be quite painful otherwise. It is best to also let the genitals air dry as well.[24]


Expert Q&A
Did you know you can get expert answers for this article?
Unlock expert answers by supporting wikiHow
-
QuestionCan you use a blow dryer on a dog?
 Marie LinMarie Lin is a Licensed Pet Groomer and the Owner of Marie's Pet Grooming, a grooming salon based in New York City. Marie has over 10 years of pet grooming experience specializing in dogs and cats. She earned her pet grooming certification from the American Academy of Pet Grooming New York in 2009 and is also a member of the National Dog Groomers Association of America. She earned a Master of Business Administration (MBA) from Hawaii Pacific University in 2007.
Licensed Pet GroomerYes, you can use a blow dryer on a dog. Just use a lower heat setting and slower speed.
Support wikiHow by unlocking this expert answer.
-
QuestionHow do I keep my dog calm when I blowdry them?Marie LinMarie Lin is a Licensed Pet Groomer and the Owner of Marie's Pet Grooming, a grooming salon based in New York City. Marie has over 10 years of pet grooming experience specializing in dogs and cats. She earned her pet grooming certification from the American Academy of Pet Grooming New York in 2009 and is also a member of the National Dog Groomers Association of America. She earned a Master of Business Administration (MBA) from Hawaii Pacific University in 2007.
Licensed Pet GroomerIf your dog is nervous about blow drying, start with their hind legs first. Work your way to the front of your dog, keeping the dryer set on low speed.Support wikiHow by unlocking this expert answer.
Warnings
- Note that some dog breeds, such as Spanish Water Dogs, are not meant to be groomed with a blow dryer as it can damage their fur. Consult your veterinarian before proceeding.⧼thumbs_response⧽
- Stop the grooming process if your dog becomes aggressive or tries to bite. This can be a sign of stress and is potentially dangerous to you or anyone else around.⧼thumbs_response⧽

References
- ↑ https://pethelpful.com/dogs/Grooming-Lessons-from-a-Real-Groomer-Lesson-7-How-to-Dry-your-Pet
- ↑ https://pethelpful.com/dogs/Grooming-Lessons-from-a-Real-Groomer-Lesson-7-How-to-Dry-your-Pet
- ↑ http://herepup.com/best-dog-dryers/
- ↑ https://pethelpful.com/dogs/Grooming-Lessons-from-a-Real-Groomer-Lesson-7-How-to-Dry-your-Pet
- ↑ http://herepup.com/best-dog-dryers/
- ↑ http://herepup.com/best-dog-dryers/
- ↑ http://herepup.com/best-dog-dryers/
- ↑ https://pethelpful.com/dogs/Grooming-Lessons-from-a-Real-Groomer-Lesson-7-How-to-Dry-your-Pet
- ↑ Marie Lin. Licensed Pet Groomer. Expert Interview. 2 November 2020.
- ↑ https://pethelpful.com/dogs/Grooming-Lessons-from-a-Real-Groomer-Lesson-7-How-to-Dry-your-Pet
- ↑ Marie Lin. Licensed Pet Groomer. Expert Interview. 2 November 2020.
- ↑ http://www.vetstreet.com/dr-marty-becker/is-it-safe-to-blow-dry-my-dog
- ↑ https://pethelpful.com/dogs/Grooming-Lessons-from-a-Real-Groomer-Lesson-7-How-to-Dry-your-Pet
- ↑ http://www.peteducation.com/article.cfm?c=2+2095&aid=785
- ↑ https://pethelpful.com/dogs/Grooming-Lessons-from-a-Real-Groomer-Lesson-7-How-to-Dry-your-Pet
- ↑ https://pethelpful.com/dogs/Grooming-Lessons-from-a-Real-Groomer-Lesson-7-How-to-Dry-your-Pet
- ↑ http://www.vetstreet.com/dr-marty-becker/is-it-safe-to-blow-dry-my-dog
- ↑ http://www.peteducation.com/article.cfm?c=2+2095&aid=785
- ↑ http://www.nylabone.com/dog-101/grooming/hair-types/long-coat/
- ↑ http://www.vetstreet.com/dr-marty-becker/is-it-safe-to-blow-dry-my-dog
- ↑ http://herepup.com/best-dog-dryers/
- ↑ http://www.clickertraining.com/node/3199
- ↑ http://www.clickertraining.com/node/3199
- ↑ https://pethelpful.com/dogs/Grooming-Lessons-from-a-Real-Groomer-Lesson-7-How-to-Dry-your-Pet
- ↑ http://thebark.com/content/dog-washing-tips
- ↑ http://www.petsafe.net/learn/diy-dog-grooming-basics
About This Article

Before blow drying your dog after bath time, soak up most of the water with a towel. Try to press and squeeze sections of fur instead of aggressively rubbing. Next, turn your blow dryer to a warm setting and begin blow drying the hind area, eventually moving up toward the neck and face area. After you’ve done the face, move your hands against the grain of your pup’s fur to expose the undercoat, then blow dry that layer as well. You’ll know you’re done when your hand is only a little bit wet after running it through the fur. For more tips from our Veterinary co-author, including how to make the blow drying experience a good one, read on!