This article was co-authored by Ryaan Tuttle. Ryaan Tuttle is a Home Improvement Specialist and the CEO of Best Handyman, Inc. in Boston, Massachusetts. With over 17 years of experience, he specializes in building home service businesses, focusing on creating scalable and efficient brands. With the help of his global team, the companies have achieved over 10+ million in sales and received recognition through magazine features, and enjoy partnerships with wikiHow and Jobber field service software. Boston Magazine and LocalBest.com have named Best Handyman Boston the Best Handyman in Boston. Ryaan holds Construction Supervisor and Home Improvement Contractor Licenses.
There are 7 references cited in this article, which can be found at the bottom of the page.
wikiHow marks an article as reader-approved once it receives enough positive feedback. In this case, 100% of readers who voted found the article helpful, earning it our reader-approved status.
This article has been viewed 744,201 times.
Although most projects involving wood use straight boards, some require bent wood. Bent wood can add uniqueness and flair to a project. There are several different methods that can be used, each with its advantages and disadvantages. Experiment with different techniques so that you find out which ones suit your particular project.
Steps
Bending Wood with the Steam Box Method
-
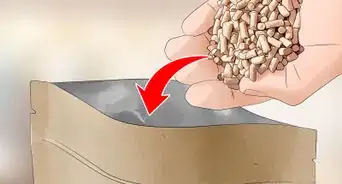
1Set up your steam box. The steam box can be a wooden box that you construct to hold the wood to be bent, or it can be a piece of PVC or other kind of pipe. The box needs to have a hole through which you can pump in the steam. It also needs an exit hole so the steam pressure doesn't blow up the box.[1]
- For best results, set up the exit hole so that it's turned toward the ground. This will allow the pressure inside the steam box to push the water out of your box.
-
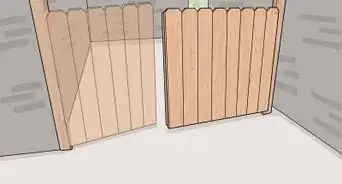
2Set up your form. The form is a shaped holder that receives the steamed wood. When dry, the wood will remain in shape of the form.
- You will probably need to clasp down the wood to the form with clamps. You can either make your own wooden clamps or purchase them. Try making some circle offcuts into which you drill an off-centre hole; pass a bolt through that and drill another hole through the side which you use to lever them shut. This makes for an effective clamp.[2]
Advertisement -
3Steam the wood. Turn on the heat. Seal your wood inside the chamber and start steaming. On average, the wood should be steamed one hour for each inch of thickness.
-
4After appropriate time, remove wood from box and place steamed wood in the form. Do this as soon as possible after removing it from the steam box. Let sit until the wood is completely dry.
- Bend the wood gently and carefully. Different kinds of wood are springier than others and different cuts can withstand more force. It would be a shame to break your wood while you're trying to bend it.
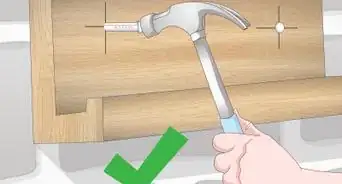
- Clamp your wood down as soon as you've set it in place. Some prefer to clamp as they form the wood; clamping piecemeal may give you more flexibility and control.
Bending Wood with the Lamination Method
-
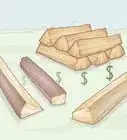
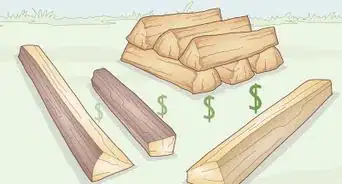
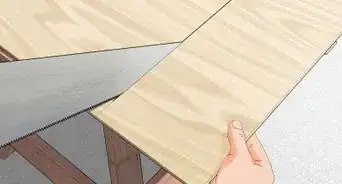
1Prepare the wood to be bent. Cut the length of your wood strips to be a little longer than your necessary final measurement. The curve will shorten the length.
- Before you cut, make a diagonal line with a pencil and a ruler across the bottom of your stock. This way, if the wood strips get dropped or rearranged, you'll be able to tell which order your strips belong in.
- Cut your wood strips through a straight-grained edge, not on the face-grain side. This will help you put back the strips together with minimal interruption.
-
2Line your form with thin cork liner. Cork with help both anchor the lamination to its form and even out any irregularities in the sawn form so that you have an even crisper bend.
-
3Spread glue on top of one of your wood strips. The glued strips will hold the wood in the bent shape.[3]
- Use a disposable roller to dispense the glue onto the wood.
- Use the right kind of glue:
- Try a two-part urea-formaldehyde glue. This glue sets very hard but also slowly.
- Try an epoxy. Epoxies are very effective but also expensive.
- Do not use standard wood glue for bent laminations. Normal wood glue sets soft and quickly, making it less ideal for this kind of project.
-
4Place wood in the form as soon as possible before the glue has time to set. Top this with another wood strip lined with glue. Repeat this process until you have obtained your desired thickness. Clamp the pieces together. Once the glue is dry, cut the ends to your desired measurement.
Bending Wood with the Kerf-cutting Method
-
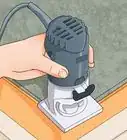
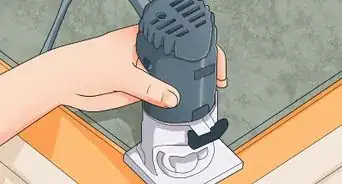
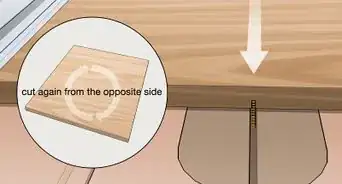
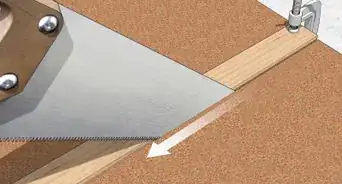
1Prepare your wood. Cut notches, or curves, 2/3 of the thickness of the wood. The kerfs are located on the inside of the curve you are attempting to fashion. Be careful. If the kerfs are too deep, they may break the wood.[4]
- The key to kerfing is even spacing. Space all of your kerfs out as evenly as possible. Try to get the kerfs about 1⁄2 inch (1.3 cm) apart.
- Always cut across the grain. The chance that your wood splits is much higher if you cut the kerfs with the grain.[5]
- You can use a Dremel tool.[6]
- There are a variety of blades and attachments you can use with it.
- It is suitable for making little notches.
-
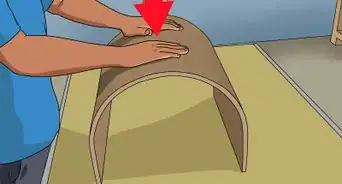
2Compress the ends of the wood to push the gaps created by the notches together. This will be the shape of the wood when it is finished.
-
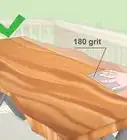
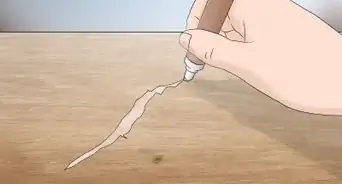
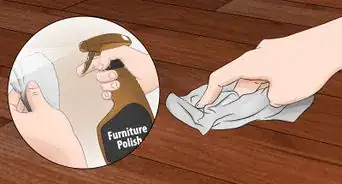
3Fix the bend. Face the front side of the wood with a veneer or laminate. This not only will fix, or set, the bend, it will also hide the any cuts that occurred during the process.
- If you want to disguise the kerfing, mix together glue and sawdust (or an appropriate wood filler) and fill the spaces left in the bent wood.
Community Q&A
-
QuestionHow do I make a curved shield?
 Community AnswerMake a form similar to the first method, but in 3D. Steam, and glue thin sheets; press together very hard.
 -
QuestionShould I cut the wood against the grain or across the grain?
 Community AnswerCut across the grain.
 -
QuestionWhat if I over-bend wood - how do I fix it?Community AnswerIf you steam bent the wood, you could just steam it again and that would be the only option. If it were kerf bent or laminate bent you're out of luck.
Things You'll Need
- Form or mold
- Heat source
- Container to heat water
- Hose
- Steam box
- Various fittings
- Gloves
- Wood to be Bent
- Glue
- Saw
References
- ↑ https://www.highlandwoodworking.com/library/steambox.pdf
- ↑ https://cutthewood.com/diy/how-to-curve-wood
- ↑ https://www.thewoodwhisperer.com/videos/bent-lamination/
- ↑ https://www.theartofdoingstuff.com/kerf-cutting-how-to-bend-wood-with-your-mind-i-mean-saw/
- ↑ http://stusshed.com/2007/07/17/kerfing-bending-wood-on-the-tablesaw/
- ↑ https://www.eternaltools.com/blog/complete-guide-to-your-dremel-rotary-tool
- http://www.popularwoodworking.com/techniques/bending_wood_the_wright_way
About This Article

To bend wood easily, use a steam box, with a PVC tube to add the steam and an exit hole to release excess steam. Then, create a form to shape the wood, and place the wood that you want to steam into the box. Seal the door and turn on the steam, leaving the wood in the box for 1 hour for each inch of thickness. Once enough time has passed, remove the boards from the box, and place the boards in the form, bending them slowly and carefully to prevent splintering. For tips on using the lamination and kerf-cutting methods to bend wood, read on!