This article was co-authored by Jacob Pischer. Jacob Pischer is a Home Improvement Specialist and the Owner of Helpful Badger, a home repair service in Portland, OR. With over four years of experience, Jacob specializes in a variety of handyman services including pressure washing, cleaning gutters, repairing drywall, fixing leaky plumbing fixtures, and repairing broken doors. Jacob studied at Madison Area Technical College and has a background in real estate investment.
There are 7 references cited in this article, which can be found at the bottom of the page.
wikiHow marks an article as reader-approved once it receives enough positive feedback. In this case, 84% of readers who voted found the article helpful, earning it our reader-approved status.
This article has been viewed 836,330 times.
Installing laminate flooring is a big job to tackle. Whether you are doing it yourself, or hiring a professional, it is a good idea to know and understand common problems that may occur. Most problems can be avoided if you know what to look for and how to properly handle the laminate.
Steps
Preparing for Installation
-
1Be sure you are up to the challenge. Installing new floors is a big task and is fundamental to your home. To be successful, you need to have patience, adequate knowledge, and proper tools. Understand the time, energy, and commitment that is required before starting major projects.[1]
- If you choose to hire a professional, be sure they are licensed and experienced. Check their references.[2]
-
2Check the sub-floor. Sub-floors are typically concrete or cement and develop weaknesses over time. If you place laminate flooring on a weak or uneven sub-floor, the new floor will be compromised and eventually buckle, damage the laminate locking system, creak, or create micro gaps in the new floor. Here are some ways you can check for problems in a sub-floor:[3]
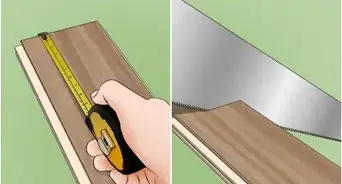
- Use a level to see how flat the floor is. Lay a four to six foot level on the sub-floor, and see how close you can get the bubble to float between the vertical lines. If you find that the bubble is floating to one end of the level, the floor may be uneven.
- Use the level to measure gaps. Any depressions that measure less than 1/8" are okay for a new floor installation. If you find gaps larger than 1/8", then you may need to use self-leveling mortar to level the surface.[4]
- Measure for any areas that peak higher than 1/8". These areas will need to be lowered to create an even surface. Wood floors will need to be sanded down, and concrete floors will need grinding. Mark all of the uneven areas with a felt-tipped marker to keep track.[5]
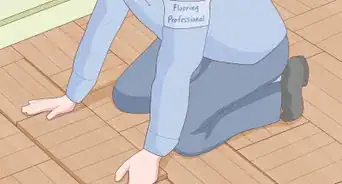
- Check the dimensions of the room, as well—and keep in mind that a room is almost never perfectly square. Houses settle over time, so you need to take constant measurements throughout the project to make sure you don't cut too much off of a tile.[6]
Advertisement -
3Choose quality material. Cheap laminate flooring has a higher chance of being defective right away and over time. Through usage, it may warp, buckle, and develop permanent stains. If you are working with a professional carpenter, ask for their opinion on the best brands. If you are on your own, ask an experienced home center employee, call a contractor, or check online for reviews on products you are considering.
- Purchase approximately 15% more laminate than you expect you will need. This will be useful for boards that are damaged, or in case the measurements are not accurate.[7]
- Check to make sure you buy products that do not contain harmful chemicals.
-
4Install proper underlayment. Underlayment is a thin, hard layer of either cement board, wood, or foam. It is vital to the overall project because it protects the floor from moisture which can seep in from sub-floors such as concrete. Once the laminate flooring is introduced to moisture, it will absorb into the laminate and expand. Proper underlayment will help prevent the laminate from absorbing moisture which reduces buckling and warping over time. Underlayment also insulates noise, maintains the temperature in your home, and creates a smoother surface.[8]
- Plywood is the recommended underlayment material for laminate flooring. However, the specific kind of plywood you use will depend on what your floors will be exposed to after installation. For example, if you live in a humid climate, marine plywood is recommended. When purchasing underlayment, check with the professional for guidance on the best type for you.[9]
- Plywood underlayment is usually cheap and easy to install. It comes in large sheets that are placed down to cover the floor, and it is secured in place with screws along the edges.[10]
-
5Monitor the temperature of the laminate. Flooring that has been left outside, or in a cold atmosphere, is fully contracted. If you start installing the flooring right when you bring it inside, then part of the floor will be installed cold. If the laminate is installed while it is still cold, it will slowly come to room temperature and change in size. Even if there was only a small section that was installed cold, it will expand and put pressure on the rest of the floor. This can cause humps and cracks in the floor and ruin the overall project.
- Allow your flooring to warm up overnight before installing it.


Preventing Problems During Installation
-
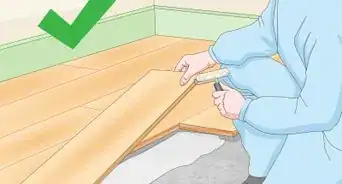
1Follow the manufacturer's installation directions carefully. Most modern laminate flooring does not require you to tap or pound it into place. Instead, they use a system of locks that "click" together. If you hammer planks together that use this system, you may break the edges, and your floors will not lock correctly.[11]
-
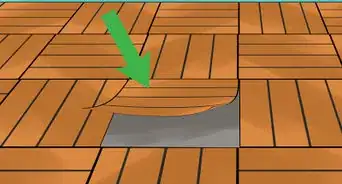
2Inspect each piece of laminate. As the laminate is being installed, look at the laminate planks and edges to ensure they are the right pattern and don't have any visible defects. Replacing just one piece of installed laminate is difficult once surrounding pieces have been installed.[12]
- Manufacturers will not cover defective pieces once they have been installed.[13]
-
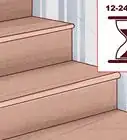
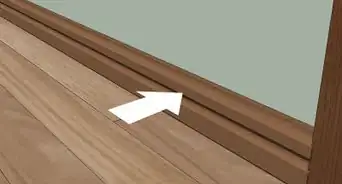
3Allow room for expansion. While you want to prevent laminate flooring from expanding, there is no way to avoid it completely. To accommodate this unavoidable problem, it is important to leave a small amount of space around the edges of the room you are installing laminate flooring. If you do not leave expansion clearance, the floors may warp and buckle not that long after installation.
- Be sure to leave about 1/2" of space along the edges of the room. To be safe, check with a professional to figure out what the best amount of space to leave is for the room type and climate.
-
4Watch for gaps between pieces. Most quality laminate flooring is made with grooves and other designs that allow the pieces to lock together. This helps to prevent gaps. Pieces that do not get locked together properly will drift apart over time. The gaps will show as dark lines which are actually open expanses. You can correct these spaces with a rubber mallet. Tap the pieces back together as soon as you notice the problem.[14]
- If gaps are left unattended, moisture or debris will fall into the spaces and make it hard to fit them snugly back together.
- If you don't have a rubber mallet, find a tool that is durable enough to move the laminate but won't scratch or harm the laminate surface.


Expert Q&A
Did you know you can get expert answers for this article?
Unlock expert answers by supporting wikiHow
-
QuestionWhy isn't my flooring lining up with the wall?
 Jacob PischerJacob Pischer is a Home Improvement Specialist and the Owner of Helpful Badger, a home repair service in Portland, OR. With over four years of experience, Jacob specializes in a variety of handyman services including pressure washing, cleaning gutters, repairing drywall, fixing leaky plumbing fixtures, and repairing broken doors. Jacob studied at Madison Area Technical College and has a background in real estate investment.
Home Improvement SpecialistRooms are never square. Just because a wall looks like it's a perfect 45°angle, it's probably not, because houses settle and move. Make sure you take constant measurements all the way through the project to make sure you're not cutting too much away when you're up against the wall.
Support wikiHow by unlocking this expert answer.


References
- ↑ https://trustedpros.ca/articles/flooring/how-to-avoid-laminate-flooring-mistakes
- ↑ https://trustedpros.ca/articles/flooring/how-to-avoid-laminate-flooring-mistakes
- ↑ http://www.bestlaminate.com/11-biggest-mistakes-when-installing-laminate-flooring
- ↑ http://homeguides.sfgate.com/determine-floor-level-36118.html
- ↑ http://homeguides.sfgate.com/determine-floor-level-36118.html
- ↑ Jacob Pischer. Home Improvement Specialist. Expert Interview. 4 September 2020.
- ↑ http://thefloorproject.com/how-much
- ↑ http://woodworking.about.com/od/plywood/p/PlywoodGrades.htm
- ↑ http://woodworking.about.com/od/plywood/p/PlywoodGrades.htm
- ↑ http://homerenovations.about.com/od/floors/a/Plywood-Underlayment.htm
- ↑ http://www.bestlaminate.com/11-biggest-mistakes-when-installing-laminate-flooring
- ↑ http://www.bestlaminate.com/11-biggest-mistakes-when-installing-laminate-flooring
- ↑ http://www.bestlaminate.com/11-biggest-mistakes-when-installing-laminate-flooring
- ↑ https://trustedpros.ca/articles/flooring/how-to-avoid-laminate-flooring-mistakes
About This Article

To avoid common problems when installing laminate flooring, inspect the sub-floor before installation to ensure that it is level. If you find any depressions or peaks that are more than 1/8 inch, you will probably need to use mortar to level out the floor. Then, purchase quality laminate flooring and underlayment, and before you install anything, look over each piece to check for defects before installing it. Carefully read the manufacturer's directions and seek professional assistance, if you encounter issues. To learn how to allow room for expansion while installing your laminate flooring, read on!