wikiHow is a “wiki,” similar to Wikipedia, which means that many of our articles are co-written by multiple authors. To create this article, 19 people, some anonymous, worked to edit and improve it over time.
This article has been viewed 212,815 times.
Learn more...
Applying a wall decal can be a quick and easy way to add a new style to any room. Decals are designed for fast application, making decorating a space as simple as possible. Make a space your own in no time at all!
Steps
Preparing for Application
-
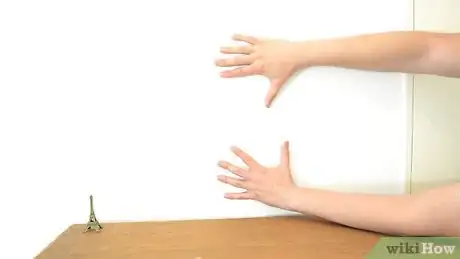
1Select a space. Find the perfect space for the new decal. Look for any bare walls that could use some decoration or an old space that needs a fresh look. Take notes on details of the space that you are planning on using.
- Take measurements of the space.
- Take notes of existing decorations and colors.
- Think of any possible layouts for a decal.
-
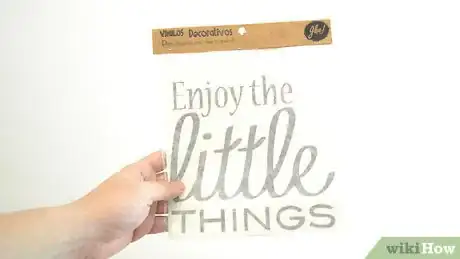
2Find your decal. Locate a decal that will be the best fit for your space. Use your measurements and notes about your space to help your selection.
- Try to find colors that work well together.
- Find the right size decal for the space.
- Think about how the decals shape and design will make the space feel.
- Select a decal that you will enjoy!
Advertisement -
3Clean the surface. Removing any dirt or oil from the surface is very important. Making a clean surface will allow the decal to adhere properly. Leaving dirt or oil behind will cause the decal to adhere to them, rather than the wall.[1]
- Remove dirt and oil for best application.
- Remove dirt with a damp sponge.
- Use a small amount of soap to remove oil.
- Be sure the wall is dry before placing the decal.
-
4Adjust the placement. Double check the decal is going to look great in the place you have selected. Removing a decal is possible, but most will not be reusable. Ensure that you are satisfied with where you are considering placing the decal to avoid ruining it.[2]
- Leave the paper backing on and temporarily tape the decal to the wall.
- Step back and examine how the decal fits the space.
- Make any adjustments until you are happy with how it looks.
-
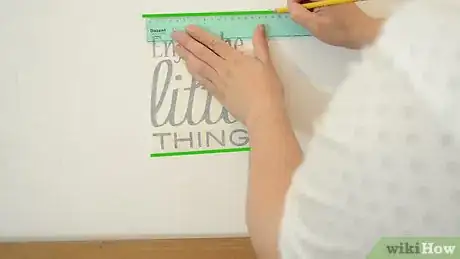
5Finalize the placement. Get your ruler and a pencil ready. Use your initial placement of the decal to help you as you draw a light guideline. This guideline will show you exactly where to place the decal when you apply it.
- Hold your level flat against the wall.
- Move the levels ends up or down, left or right, until the air bubble is centered.
- Draw a light line on the wall, along the edge of the level, to make your guideline.
Applying the Decal
-
1Place the decal. Placing the decal requires accuracy and focus. Stick the decal as close as you can to the guideline you created for it.
- Remove the covering that protects the adhesive side of the decal.
- Line up the decal with your guideline.
- Carefully stick the decal to the area you have selected.
- Work slowly and take your time to ensure accuracy.
-
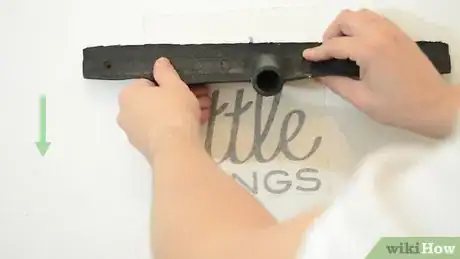
2Finalize the application. Using a squeegee, smooth the surface and remove any air bubbles that may be present. Leaving air bubbles can cause an uneven finish and improper adherence to a surface.[3]
- Work from the middle and move outwards.
- Always push air bubbles outwards towards an edge to remove them.
- Aim for as smooth a surface as you can.
-
3Remove the paper backing. Paper backing protects the face of your decal, but now it's time to unveil your new decal. Removing the paper backing will let you see the final and full effect of the decal on your space.
- Peel paper backing from decal slowly and carefully.
- Dampen the paper with water if you are having trouble removing it.
- If the decal pulls off with the paper backing, stop, and carefully reapply that area.
Community Q&A
-
QuestionWhat can I use to stop them coming off after applying?
 Community AnswerYou can use a clear adherent like Mod Podge to seal in your decal and keep it in place.
 -
QuestionI'd like to put decals on freshly painted wall. I've seen recommendations to wait anywhere from 5 days to 4 weeks after painting. Can I put apply them after 1 week if I blow-dry the area first?
 Community AnswerDecals can be applied relatively quickly, but try to wait at least a week and a half.
 -
QuestionDo I use a hairdryer in the end? And if so, what temperature do I use?
 Community AnswerDo not use a hair dryer, as it can all too easily remove the wall decor. This makes sense because essentially you are melting off the adhesive material used for the product. Avoid bubbles by pushing them off with a flat sturdy plank or a strong ruler.
Things You'll Need
- Decal of choice
- Cloth/sponge
- Water for cleaning wall/saturating back of decal
- Level
- Pencil to mark a guideline
- Soap (optional)
- Rubber squeegee
References
- ↑ https://www.apartmenttherapy.com/getting-it-right-the-first-time-how-to-layout-and-apply-stickon-wall-decals-apartment-therapy-tutorial-188592
- ↑ http://homeguides.sfgate.com/put-up-vinyl-wall-art-50325.html
- ↑ http://dalidecals.com/Installation-Instructions-Dali-Wall-Decals.html
- Videos provided by Wall Decals - DezignWithaZ
About This Article
To apply wall decals, start by holding or taping the decal up to check the placement before putting it on since most decals are not reusable. Next, trace around the decal with a pencil so you know exactly where to place it. Then, line the decal up with your marks, and carefully stick it to the area you selected. Then, use a squeegee to smooth the surface and remove any air bubbles before removing the paper backing. To learn how to prepare a surface before putting a decal on, keep reading!
