This article was co-authored by wikiHow Staff. Our trained team of editors and researchers validate articles for accuracy and comprehensiveness. wikiHow's Content Management Team carefully monitors the work from our editorial staff to ensure that each article is backed by trusted research and meets our high quality standards.
This article has been viewed 86,248 times.
Learn more...
Sometimes actors have to take certain measures to change their appearance for a performance. This can be achieved by simply wearing a distinctive costume, or it can also involve more complicated makeup effects. One effect that can seem intimidating is crepe hair — a bundle of dyed wool that can be cut and styled as needed for costuming. It has many uses ranging from something as simple as a moustache to a complicated look like a werewolf. It may appear to be difficult to apply, but it is much simpler than many people expect.
Steps
Selecting and Preparing the Crepe Hair
-
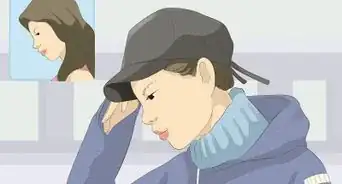
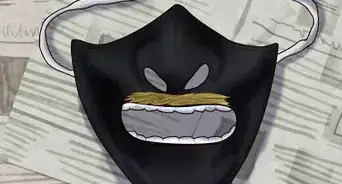
1Choose your style of facial hair. Crepe hair can be the perfect addition to a character’s look, but it is important to know what shape of facial hair you want. The more popular styles are mustaches, sideburns, and beards. The application process can be applied to many styles, so don’t let these suggestions limit you.[1]
- If you work better by having a visual, then you can print out a makeup chart from online, and map out where you are going to put the crepe hair. This can be especially helpful if you are using it alongside other makeup effects.[2]
-
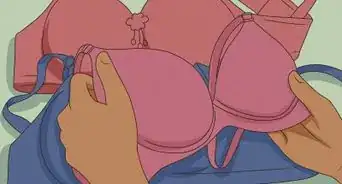
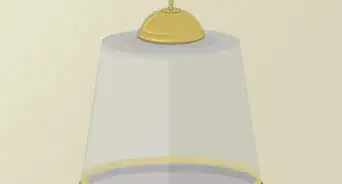
2Purchase crepe hair in the desired color and length. You can purchase crepe hair online with retailers like Amazon, or in person at costume stores. Crepe hair is available in a variety of colors and is often made from real wool. It comes in packages of tightly woven braids that will straighten out to three times the packaged length.[3]
- Real hair is often a combination of colors. So if you want a hyper-realistic look, then think about blending a few different colors together.[4]
Advertisement -
3Grab one end of the crepe hair and gently pull the braid apart. The crepe hair is braided together with several strands of twine. This motion will unravel the twine that is holding the braid together. You can discard all of the twine once you have the braid unraveled.[5]
-
4Cut the bundle of hair to an approximate desired length. Cutting the hair to a more manageable length will make styling the hair easier. If you want to use the entire length you purchased, then don’t worry about cutting it.[6]
-
5Fluff and separate the strands as desired for your character look. If you want a curly beard for your character look, then you need to separate and fluff the strands of the crepe hair before applying it to your face.[7]
-
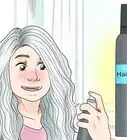
6Straighten the hair by wetting and drying it 24 hours before application. If you need straight hair to complete your character look, then you can straighten it by submerging it in water for 30 seconds. The water will help uncurl the strands and straighten out. After submerging, lay the bundle out on a towel to dry. The crepe hair must be completely dry before applying it.[8]
- Submerging the crepe hair in water is an effective, but time-consuming process. So if you are using this method to straighten the crepe hair, then you are going to want to do this at least one day before application.[9]
-
7Use an iron to stream press the hair if you need to straighten it quickly. Steam pressing the crepe hair in small sections will work out any unwanted curls or waves. Just make sure to only work on one section of the crepe hair at a time, otherwise, it may not straighten.[10]
- You can also weigh down one end of the section on your ironing board and pull it until it is taught. This will make steaming and straightening it easier.[11]
- Using a steam iron is the quickest way to straighten any length of crepe hair, but also the most tedious if you are not experienced using a steam iron.[12]


Applying the Crepe Hair
-
1Wash and dry your face. You are going to want a clean surface to apply the crepe hair to. Just make sure that your skin is completely dry before applying it.[13]
-
2Put on stage makeup before applying the crepe hair. If you are planning to use any stage makeup, then apply the makeup and let it set. Once the makeup is set, you can then begin to apply the crepe hair.[14]
-
3Separate the hair into small sections, no wider than 1 inch (2.5 cm). Working with small sections will give you more control when adhering the crepe hair, and give you a more natural look.[15]
-
4Begin application at the bottom of your face and work your way upward. When you are applying the crepe hair, you will generally want to start from the lower portions of your face and work your way up.[16]
- For hair around the chin, you will want to start applying the crepe hair in a line underneath your chin and then work in thin layers up from that point.[17]
- For a moustache, layer short tufts of crepe hair on your upper lip. These tufts should be added in thin layers that work upwards towards your nose.[18]
- To create a beard, start with a line of crepe hair that stretches from ear to ear, going across your neck, and work upwards in thin layers from that point.[19]
- For sideburns, begin the first layer of crepe hair horizontally along your jaw, and then work in thin layers upwards along the side of your face towards your natural hairline. Then repeat this for the other side of your face, and try your best to make the sides as even as possible.[20]
-
5Use a small brush to apply spirit gum or liquid latex to your skin. Try and apply the adhesive in small sections — working from the bottom of your look, upwards. You don’t want to cover large portions of skin with the liquid adhesive because it might dry or adhere unwanted portions of crepe hair.[21]
- Be careful to not put the liquid latex or spirit gum close to your eyes. If you need to apply crepe hair near the area around your eyes, then use an eyelash adhesive instead.[22]
- If you are using spirit gum, then you will want to increase the tackiness of it. After brushing the spirit gum onto your skin, use your finger to gently tap the area where you applied the spirit gum.[23]
-
6Press the prepared section of crepe hair into the applied adhesive. Not every strand will stick to the adhesive, so do your best to remove ones that are not sticking.[24]
-
7Repeat the application process until the desired area of skin is covered. To achieve a more realistic look, make sure to apply the crepe hair in thin layers, and remember to build upwards on your face.[25]
- If the crepe hair is going on your face, then think about your natural bone structure beneath your face and use it as a guide for the hair placement. This will help create a realistic structure of hair growth.[26]
- If the crepe hair is going on areas other than your face, then it is not as vital to think about bone structure, rather than using your visual judgement for what placement looks most natural.[27]
-
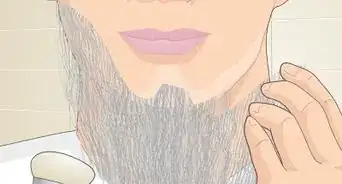
8Use scissors to trim the applied crepe hair as desired. Now that you have applied all of the crepe hair, it might seem overly bushy or longer than you intended. You can use scissors to trim the crepe hair into the style you envisioned.[28]
- If you begin to notice any unwanted bald spots or patches, then make sure to fill the spots in and then trim if necessary.[29]


Removing the Crepe Hair
-
1Pull off as much of the crepe hair as you can without hurting yourself. You want your skin as exposed as possible to remove the adhesive. If you are unable to get any of the crepe hair off, then trim it down with a pair of scissors.[30]
-
2Peel off the liquid latex with your fingers. Liquid latex adheres to your skin like a layer of paint, and can easily be pulled off. Work from any raised edges that might have occurred from pulling off the crepe hair, or use your fingernail to lift the outermost edges of the liquid latex. Just know that if you have any small hairs underneath it, it will most likely pull those out.[31]
-
3Dissolve the spirit gum using spirit gum remover. Spirit gum cannot be pulled off your skin; it needs to be dissolved. You can pour the remover onto cotton balls or a soft cloth, and then wipe away at the spirit gum until it dissolves and the remaining crepe hair has fallen off.
-
4Wash your face with soap and warm water. Your skin might be a little red or irritated from the adhesive and the remover. So you are going to want to clean your pores thoroughly with soap to remove any remaining residue.[34]


Community Q&A
-
QuestionCould I dye it myself?
 SylghoulsTop AnswererSure! A sharpie dye bath should work, if you need to dye it a darker color. The channel "Elite Cosplay" on YouTube has an excellent tutorial on how to do this, if you're unfamiliar with the method.
Things You’ll Need
- Crepe wool — in a color of your choice
- A liquid adhesive like spirit gum or liquid latex
- Spirit gum remover (optional)
- A sharp pair of scissors
- A mirror placed in a space with good lighting
- Cotton balls or a soft cloth
- Steam iron and ironing board (optional)
- A basin with temperate water and a towel (optional)
- A makeup chart and a pencil (optional)
Warnings
- If you have any allergies to liquid latex or spirit gum, then do not use those adhesives. To test if you are allergic, put a small amount on the inside of your wrist and leave it there for 30 minutes. If this does not cause a reaction, you are most likely not allergic. The typical allergic reaction is a bad itch similar to an insect bite. And if at any point you begin to feel discomfort while applying the crepe hair, then stop the process and remove the liquid adhesive as instructed.[37]⧼thumbs_response⧽
- Do not put the liquid latex or spirit gum close to your eyes. If you need to do work near your eyes, then use eyelash adhesive. Eyelash adhesive is a liquid latex, but only has trace amounts of ammonia which makes it safe to use around the eye area.[38]⧼thumbs_response⧽


References
- ↑ http://www.funfolly.com/h/mutips.htm
- ↑ http://www.totalbeauty.com/content/article/makeup-face-charts
- ↑ http://www.funfolly.com/h/mutips.htm
- ↑ https://www.halloweenexpress.com/creating-amazing-facial-hair-with-crepe-hair/
- ↑ http://www.graftobian.com/Theatrical-Kit-Instructions_ep_63-1.html
- ↑ https://www.halloweenexpress.com/creating-amazing-facial-hair-with-crepe-hair/
- ↑ https://www.halloweenexpress.com/creating-amazing-facial-hair-with-crepe-hair/
- ↑ https://www.halloweenexpress.com/creating-amazing-facial-hair-with-crepe-hair/
- ↑ https://www.halloweenexpress.com/creating-amazing-facial-hair-with-crepe-hair/
- ↑ http://www.graftobian.com/Theatrical-Kit-Instructions_ep_63-1.html
- ↑ http://www.graftobian.com/Theatrical-Kit-Instructions_ep_63-1.html
- ↑ http://www.graftobian.com/Theatrical-Kit-Instructions_ep_63-1.html
- ↑ http://www.graftobian.com/Theatrical-Kit-Instructions_ep_63-1.html
- ↑ http://www.graftobian.com/Theatrical-Kit-Instructions_ep_63-1.html
- ↑ https://www.halloweenexpress.com/creating-amazing-facial-hair-with-crepe-hair/
- ↑ https://www.halloweenexpress.com/creating-amazing-facial-hair-with-crepe-hair/
- ↑ https://www.halloweenexpress.com/creating-amazing-facial-hair-with-crepe-hair/
- ↑ https://www.halloweenexpress.com/creating-amazing-facial-hair-with-crepe-hair/
- ↑ http://www.graftobian.com/Theatrical-Kit-Instructions_ep_63-1.html
- ↑ http://www.graftobian.com/Theatrical-Kit-Instructions_ep_63-1.html
- ↑ http://www.graftobian.com/Theatrical-Kit-Instructions_ep_63-1.html
- ↑ http://www.funfolly.com/h/mutips.htm
- ↑ http://www.funfolly.com/h/mutips.htm
- ↑ https://www.halloweenexpress.com/creating-amazing-facial-hair-with-crepe-hair/
- ↑ http://www.graftobian.com/Theatrical-Kit-Instructions_ep_63-1.html
- ↑ http://www.graftobian.com/Theatrical-Kit-Instructions_ep_63-1.html
- ↑ http://www.graftobian.com/Theatrical-Kit-Instructions_ep_63-1.html
- ↑ https://www.halloweenexpress.com/creating-amazing-facial-hair-with-crepe-hair/
- ↑ https://www.halloweenexpress.com/creating-amazing-facial-hair-with-crepe-hair/
- ↑ https://www.halloweenexpress.com/creating-amazing-facial-hair-with-crepe-hair/
- ↑ https://ourpastimes.com/how-to-remove-liquid-latex-12450957.html
- ↑ http://www.graftobian.com/Theatrical-Kit-Instructions_ep_63-1.html
- ↑ http://www.graftobian.com/Theatrical-Kit-Instructions_ep_63-1.html
- ↑ https://www.halloweenexpress.com/creating-amazing-facial-hair-with-crepe-hair/
- ↑ http://www.graftobian.com/Theatrical-Kit-Instructions_ep_63-1.html
- ↑ https://www.halloweenexpress.com/creating-amazing-facial-hair-with-crepe-hair/
- ↑ http://www.graftobian.com/Theatrical-Kit-Instructions_ep_63-1.html
- ↑ http://www.funfolly.com/h/mutips.htm
About This Article