This article was co-authored by Yuka Arora. Yuka Arora is a self-taught makeup artist who specializes in abstract eye art. She has been experimenting with makeup art for over 5 years, and has amassed over 5.6K Instagram followers in just 5 months. Her colorful and abstract looks have been noticed by Jeffree Star Cosmetics, Kat Von D Beauty, Sephora Collection, among others.
There are 7 references cited in this article, which can be found at the bottom of the page.
This article has been viewed 27,138 times.
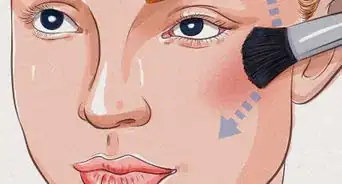
Applying cream contour is a great way to instantly shape your face and emphasize your cheekbones. While contouring can be intimidating, cream contours are easy to blend and provide full coverage, allowing you to create a seamless, chiseled look. Once you select the right cream contour for your skin tone, create a base with your usual foundation, and learn where to apply your product, you can start contouring like a pro!
Steps
Selecting Your Cream Contour
-
1Use a palette cream contour to easily find the right shade. If you aren’t sure what shade of cream contour to choose and are unable to test the products before purchasing, palettes are a great option because you will have a selection of contouring shades all in one product. In most cases, palettes of cream contour contain both contour and highlighting options.[1]
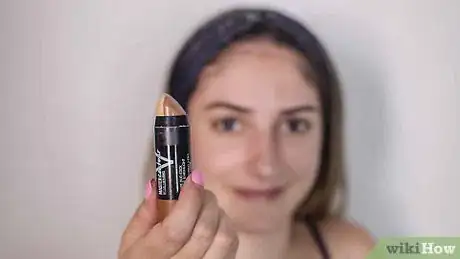
- Cream contours are also available in single-color sticks. While stick cream contours tend to be easier to apply for beginners, you will need to purchase two cream contour sticks if you want to highlight as well.
- Keep in mind that with a cream contour palette, you will need a contour brush to apply the product to your face. With a stick, you can forego the brush and apply directly.
-
2Pick a cream contour that is 1 to 2 shades darker than your skin tone.[2] When shopping for a cream contour, choose a cream that is only 1 to 2 shades darker than your skin tone so that you can create a more natural contour look.[3] It can be helpful to first look at the foundation that you use to determine the shade that is an exact match to your skin tone, then select a contour cream that is slightly darker.
- If you are shopping at a retailer that provides testers of the cream contours available, you can test the product by swiping a small amount of product across the inside of your forearm. Blend with your finger or with a disposable blending sponge if they are available.[4]
- Your goal is to mimic the actual shadows of your face, so you want to avoid any product that is too far from your natural skin tone, or that has any shimmer in it.[5]
- If you are unsure about your foundation shade, learning how to choose makeup for your skin tone will help you find the right foundation to create your base, and give you the starting point for selecting your cream contour shade.
Advertisement -
3Test your cream contour shade. While the arm test is generally effective and more hygienic when you are testing a product in a store, the only way to truly confirm if a contour shade is correct is to apply it to your face. Test out your cream contour shade by applying a small amount of product along your cheekbone. Use a blending brush or sponge to blend away the harsh lines.[6] If the shade is right for your skin tone, the product should blend seamlessly into your skin, leaving a subtle shadow effect.
- Because some retailers do not provide testers of their cream contour products, you may need to experiment with different shades before finding the right one.
Creating a Base
-
1Start with clean, moisturized skin. For best results, wash your face with your usual daily face wash. Dry completely with a clean towel. Then, apply your everyday lotion before applying any makeup products.[7] Let your skin fully absorb the lotion.
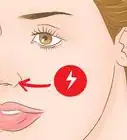
- Avoid using an exfoliating face wash directly before applying contour, as this may irritate your skin and cause redness or blotching.
-
2Prepare your skin with a makeup primer. If using primer is part of your usual makeup routine, apply primer in an even layer to your cheeks, forehead, and chin. If you use an under-eye primer, apply it under your eyes at this time as well.
- You can skip this step if using primer is not part of your normal makeup routine. However, primer can help you apply your foundation evenly and make your makeup last longer, so you might want to consider finding a primer that works for your skin type.
-
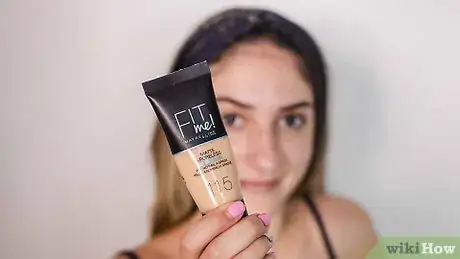
3Apply your foundation and concealer. If you normally wear a liquid foundation, apply this first as you usually do. If you have any blemishes or need to color-correct, apply your concealer at this point as well. Make sure that you blend your foundation and/or concealer completely to create an even base across your face.
- If you don’t typically wear foundation but want more coverage, learning how to apply foundation can help you create a flawless base for your cream contour.
- If your foundation does not provide enough coverage, using concealer can help hide under eye circles, acne, or discoloration.
- When using a cream contour, avoid using a powder foundation as your base.[8] Applying cream contour on top of powder can make the products lumpy and congealed, something you definitely want to avoid!
Applying Cream Contour
-
1Draw contour lines down your cheekbones. If you are using a liquid or palette contour, dip the contour brush into the product so that the tip of the brush is covered but not dripping. If you are using a cream contour stick, simply remove the cap and twist to expose the cream. Use the wider side of your brush or stick and draw a line of product down your cheekbones. Start at the top of your cheekbones (next to your ear) and follow your cheekbone line down your face, twisting or angling your brush or stick so that the line gets thinner as you go down.[9] Stop just below the apple of your cheeks.
- If you have a hard time twisting the brush, apply an even thin line all the way down and then go back to your starting point and add to make the line thicker, tapering into your original line as you go down your cheek.
- If you are using a stick cream contour, start with the stick flat on your cheek and angle up as you move down so that only the rim of the stick is touching your cheek closer to your mouth.
- To help you figure out where to stop drawing your cheek contour line, visualize a straight line down from the outside corner of your eyes. This is usually about where your contour line should stop.[10]
-
2Map out your jawline contour lines. With your contour brush or stick, apply a thin line of your cream contour along your jawline. Start at the beginning of your jawbone (close to your neck) and follow your jawbone inward, stopping on either sides of the start of your chin.
- To help you figure out where to stop your contour line, visualize a line going straight down from the edges of your mouth and stop at this point.
-
3Apply your cream contour along your hairline. To sculpt your face even more, use the thick side of your brush or stick to apply your cream contour along your hairline at your temples, as well as the right and left sides of your forehead.[11] When applying to your forehead, stop just as your hairline starts to curve in to the center.
- Remember when applying contour along your hairline that you want to mimic the natural shadows of your face. If your face shape is such that you don’t get a natural shadow along your hairline at your temples and the sides of your forehead, you might want to skip this step to keep your look as natural as possible.
-
4Make your nose contour lines to contour your nose. If you want to make your nose look thinner, longer, or straighter, draw a thin line of cream contour on either side of your nose. Using a thin brush (such as a concealer brush), start on the bone at the top of your nose, just below the inner corners of your eyes. Draw a line with your cream contour moving down towards the end of your nose on each side.
- If you do not wish to alter the appearance of your nose, skip this step.
-
5Blend your cream contour into your face. Using a blending brush or sponge (such as a beauty blender), slowly blend all your contour lines into your face until there are no harsh lines left.[12] For a more stark, chiseled look, blend just until the contour lines are blurred and fade seamlessly into your skin. If you want a more natural contour, continue to blend your contour lines until you have reached your desired effect.
Expert Q&A
-
QuestionHow can I make my cream contour look natural?
 Yuka AroraYuka Arora is a self-taught makeup artist who specializes in abstract eye art. She has been experimenting with makeup art for over 5 years, and has amassed over 5.6K Instagram followers in just 5 months. Her colorful and abstract looks have been noticed by Jeffree Star Cosmetics, Kat Von D Beauty, Sephora Collection, among others.
Makeup Artist People think applying less will make it look more natural, but only putting the product in one area actually calls more attention to it and makes it very obvious. The more you apply it in a balanced manner on multiple areas of your face, the more natural it looks.
Things You’ll Need
- Everyday face lotion
- Primer
- Liquid foundation and/or concealer
- Cream contour
- Cream contour make-up brush
- Blending sponge or brush
References
- ↑ https://hudabeauty.com/contour-101-ultimate-cream-contour/
- ↑ Yuka Arora. Makeup Artist. Expert Interview. 30 August 2018.
- ↑ http://www.rebeccashoresmua.com/blog/tutorial/highlight-contour-cream-products-tutorial
- ↑ Yuka Arora. Makeup Artist. Expert Interview. 30 August 2018.
- ↑ https://www.allure.com/story/best-contour-color-for-skin-tone
- ↑ Yuka Arora. Makeup Artist. Expert Interview. 30 August 2018.
- ↑ https://www.teenvogue.com/story/how-to-contour-makeup
- ↑ https://www.revolutionbeauty.com/us/us/How-To-Contour/cc-25.aspx
- ↑ https://www.elle.com/uk/beauty/make-up/a34420/how-to-contour/
