This article was co-authored by Kyle Kenny. Kyle Kenny is a Master Trainer, Certified Personal Trainer, and the Owner of KennyTRY Training. With more than seven years of experience, he specializes in helping people achieve their fitness goals by creating individualized meal programs, training regimens, supplementation systems, vitamin lists, and workouts. Kyle has multiple Personal Training Certifications and a Fitness Nutrition Specialist Certification through the National Academy of Sports Medicine.
There are 19 references cited in this article, which can be found at the bottom of the page.
This article has been viewed 16,118 times.
Spinning is an excellent way to get in shape! Riding the bike doesn’t put stress on your joints, which is great if you want to sweat off some steam without straining your knees or hips.[1] Adjusting a spin bike can seem intimidating at first if you’ve never ridden one, but it’s pretty simple once you know where the parts are and how to work them. Not all spin bikes are made the same, but the parts are pretty easy to adjust so you’ll be up and riding in no time!
Steps
Changing the Seat Height
-
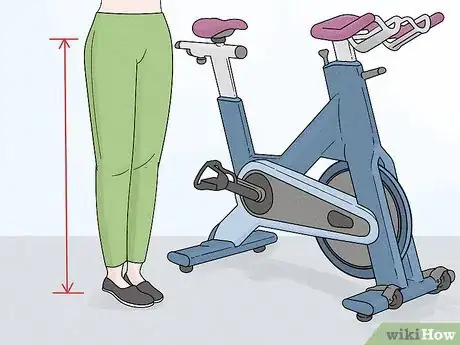
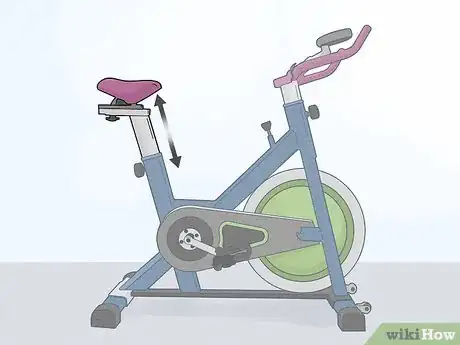
1Stand up next to the bike to find the proper height. Stand next to the seat of the bike and take note of the height of your hip bone. You can also lift your leg so that it's parallel to the ground and align the seat to the top of your thigh.[2]
- The idea is to have the top of the seat (not the bottom) in line with your hip bone.
-
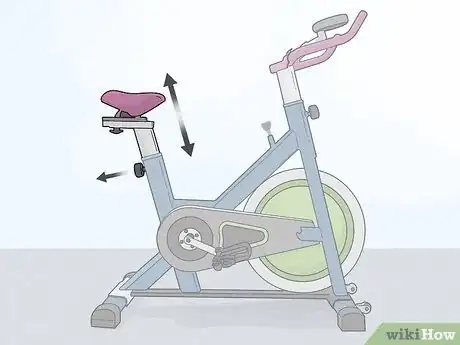
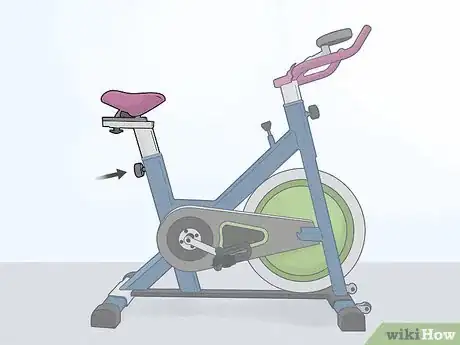
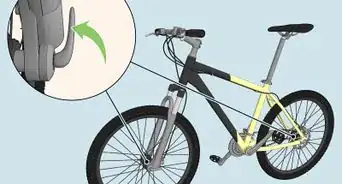
2Pull the pop-pin on the front or back of the pole holding the seat to adjust it. Stand next to the bike and locate the knob just below the front of the seat post. It’ll be situated horizontally so the bar extending from the knob can lock the seat in place. Pull it outward just slightly and then lift the seat up or push it down so the top of the seat is in line with your hip bone.[3]
- Not all bikes are made the same, so the pop-pin may be on the back pole facing the front of the bike or facing backward (away from the handles).
- Some pop-pin knobs need to be twisted to the left before you can pull them out. If that’s the case, get a firm grasp so you can twist it and then pull it.
- You may need to stop and stand next to it again while you're adjusting it to check that the seat is in line with your hip.
Advertisement -
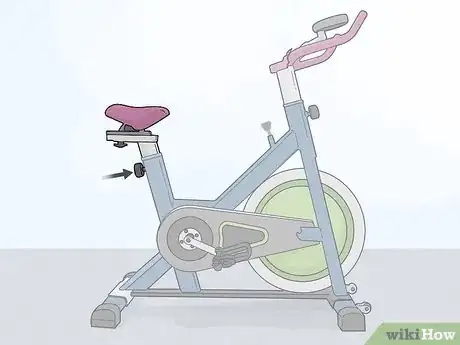
3Push the knob inward to lock the seat in place and sit on the bike. Let go of the pop-pin so it slides back into the locked position. Or, if you had to turn the knob, turn it all the way to the right until it's tight and in place. Push down on the seat to make sure it's steady before you get on to check the height.[4]
- Some pop-pins only lock by gliding into a hole like a key, so if you don't hear a click, push the seat slightly downward or jiggle it until you hear the pin lock into place.
- Depending on the manufacturer, you may see a scale of numbers ranging from 28 to 39 on the side of the bar holding up the seat. Take note of that number so you can remember your perfect height next time.
-
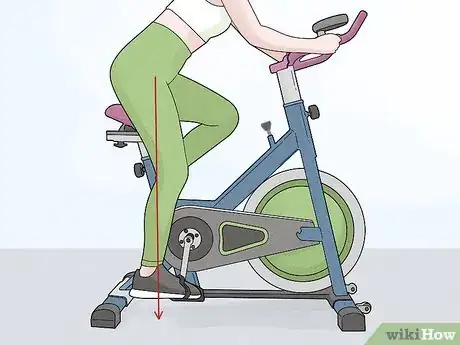
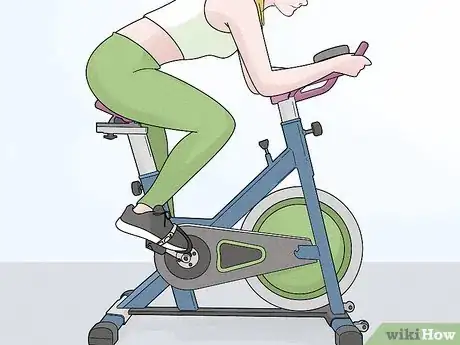
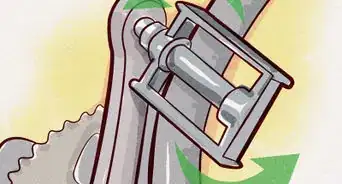
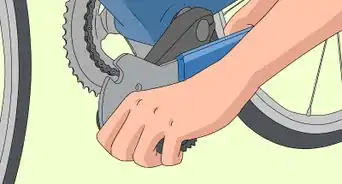
4Make sure your knee doesn't lock when your leg is extended. Pay attention to whether or not your knee is locked when your foot is in the 6 o'clock position (lowest to the ground).[5] If it's locked, get off the bike, move the seat down 1–2 inches (2.5–5.1 cm) and then get on the bike again to check your knee positioning.[6]
- Double-check by making sure your knee stays over the ball of your foot (not your toe) when your foot is in the 6 o’clock position.
- Make sure your foot isn't crammed into the toe cage while you’re checking your knee positioning. The ball of your foot should be right over the center bars of the pedals (the spindles).
Tip: If there's a mirror on either side of you, check that your thighs are making a 25 to 35-degree angle when one foot is in the 6 o'clock position and the other is in the 12 o'clock position.[7]
Moving the Seat Forward and Back
-
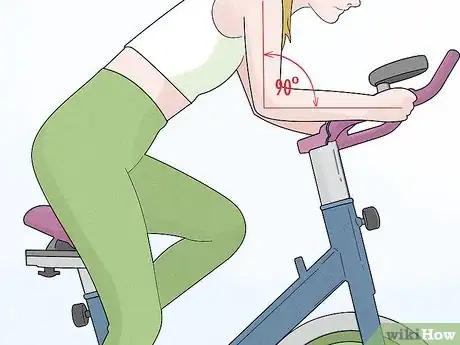
1Use your forearm length to get an idea of your ideal position. Bend your elbow so it makes a 90-degree angle. Hold your arm so that the tips of your fingers are grazing the part of the handlebar nearest to the seat and your elbow is closest to the tip of the seat. Ideally, position the seat so that the distance between it and the handlebars is about the length of your forearm with your hand extended.[8]
- If you're tall or have a longer torso, you may need to move the seat back 1–2 inches (2.5–5.1 cm) from this forearm-length guiding position.
- If you have a smaller torso, you may be able to ride with it 1–2 inches (2.5–5.1 cm) closer to the handlebars.
- This isn’t a steadfast rule, so you may need to adjust the seat forward and back a few times to find a position that allows you to pedal with good form.
-
2Look at the back of the bike under the seat to find the fore/aft control pin. Stand at the back of the bike and squat down to find the upside-down knob sticking out. The knob will almost always be attached to a horizontal bar that slides back and forth just under and behind the seat.[9]
- In some cases this knob is located on the underside of the seat itself.
- Don’t confuse this one with the other knob that raises and lowers the seat—that one lays to the side and is located on the vertical pole holding the seat while this one sits on or near the underside of the seat.
-
3Pull the pin down to unlock it and slide it into position. Grab the pin firmly with one hand and put your other hand on the top of the seat for leverage. Pull it down so it unlocks and then use your other hand to move the seat forward or back.[10]
- Depending on the make and model of the bike, you may need to twist the pin to the left so it loosens before you can pull it out.
-
4Get on the bike and check that your knees are over the balls of your feet. Move your feet so they're equidistant from the ground (at 3 o'clock and 9 o'clock). Check to make sure your knees are over the balls of your feet, not over your toes or ankles.[11]
- Make sure you're sitting on the back of the seat's saddle—your butt should be hanging over just a little bit but not so much that you feel unstable.
-
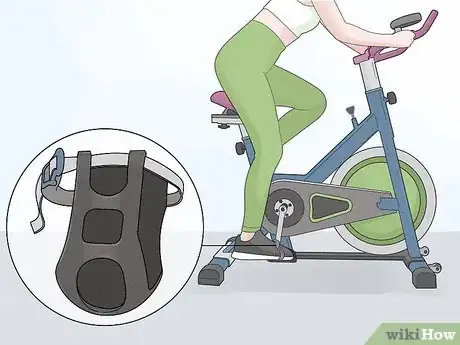
5Adjust the strap on the toe cage if you need to. Undo the strap on the toe cage just like you would a small belt, pulling the slack through the buckle and repositioning the pin 1 to 4 holes over. If you have a larger foot, you may need to loosen up the strap at the end of the toe cage (the strap that goes over your midfoot). If you have a smaller foot, tighten it up so that the ball of your foot is right below that strap and right above the center of the pedal.[12]
- It's okay if the toe of your shoe doesn't fully fill in the toe cage.
- Make sure you're pedaling with the ball of your foot, not with your pointed toe or with the heel of your foot.
- If you have foot clips, make sure the clip is positioned on your shoe below the ball of your foot. Lock it in place by sliding your foot forward (almost like putting on a high heel) and unlock it by turning your ankle slightly outward away from the bike.
Tip: You don’t need to wear cycling shoes to have proper form, but their thick, heavy soles and pedal snaps can help make sure your feet stay in the perfect position. Buy SPD (2-hole) cleats if you only plan to use them for indoor spinning at home or at the gym. Almost all gym bikes will fit with SPD cleats. If you plan to do some road-cycling, go for shoes with delta-style (3-hole) clips so you can switch to your road bike when you want to. Check with your gym to see if they can accommodate delta-style clips.[13]
Rearranging the Handlebars
-
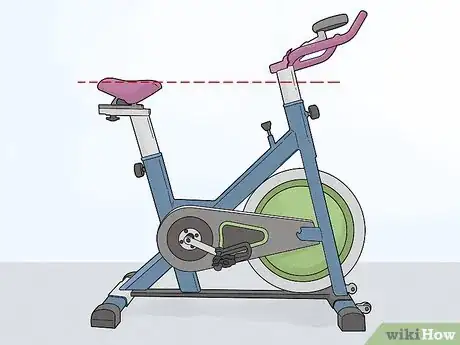
1Check that the bars are in line with or higher than the seat. Stand to the side of the bike and squat down a little to make sure the base of the handlebars are at the same height as the seat. If you're completely new to cycling or if you have a bad back, position the handlebars 1–4 inches (2.5–10.2 cm) above the seat height.[14]
- Always keep your handlebars at or above the level of your seat to maintain a good cycling form.
- Once you get used to the proper upper body form, feel free to lower your handlebars down 1 in (2.5 cm) at a time to work your core a little harder.
-
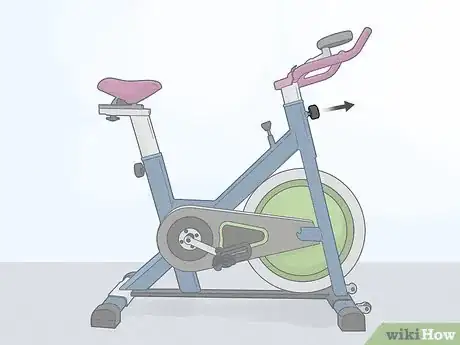
2Unscrew or pull the pop-pin at the front of the bike. Stand at the front of the bike and locate the forward-facing pop-pin just below the handlebars. Use one hand to pull it out a little into the unlocked position and use your other hand to lift the bars up or push them down. Let go of the knob or push it back in once you’ve adjusted the bars to the right height.[15]
- Depending on the make and model, you might need to twist the knob to the left to loosen it up and then pull it out.
- You can also find your proper height by standing upright next to the handlebars. The base of the bars should be in line with your hip bone or above it.
-
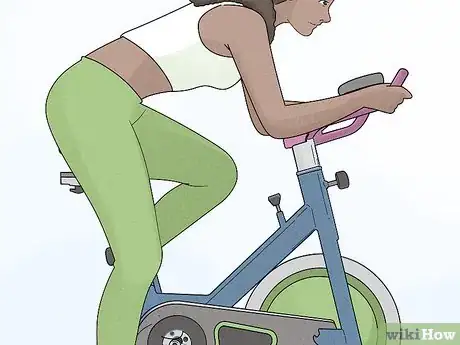
3Get on the bike to check that your elbows are slightly flexed. Sit on the bike and place your hands on the part of the bars closest to you. Keep your chest lifted and bend from your hips. Make sure your elbows and wrists are slightly bent and that you're not having to scoot forward to grasp any part of the handlebars.[16]
- Double-check by moving your hands to position 3. To do position 3, lean slightly forward from your hips and place your elbows on the part of the bar closest to you (the base). Grasp the middle bars (the ones running parallel to your body) with your hands. You should be able to do this without scooting forward or overreaching.
Increasing or Decreasing Resistance
-
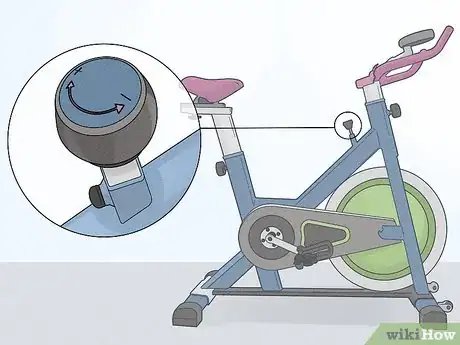
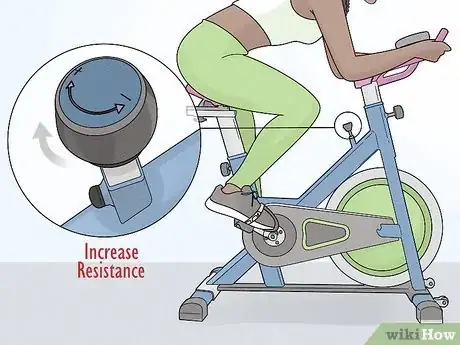
1Locate the resistance knob just below the handlebars. Look at the base of your handlebars and notice a small knob that you can turn left or right. You’ll see a “+” and a “-” sign on either side of the knob. Depending on your model, it may also look like a lever that you lift up or push down.[17]
- If your bike has a lever that functions as both the resistance changer and brake, pushing it all the way down will put on the brakes, which stops the flywheel in its place. Always push this down fully once you’re ready to get off the bike after a sweat session.
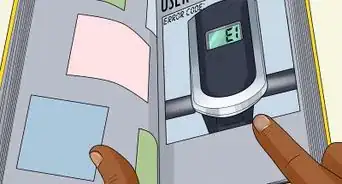
- Some bikes have a small LCD display that will tell you what resistance level the bike is set to. Otherwise, you’ll have to go by how it feels when you’re pedaling.
-
2Turn the knob to the right to increase the resistance. Use enough resistance so you're not bouncing or spinning too quickly without control. Don't add so much resistance that it affects your form.[18] If your bike has a small dial or LCD screen that tells you how many RPMs you’re at, refer to that to help you find a resistance level that’s not too tough or too easy.[19]
- If you're pedaling over 120 RPMs, that's a sign you should raise the resistance so you're engaging your muscles more and getting a great workout.
- If you're in a spin class and the instructor tells you to start a hill climb, that means you should raise the resistance by 1 or 2 levels—60 to 80 RPMs is a good speed for climbs.
- If your bike has a lever, push it down to increase the resistance.
- Adding more resistance over time will increase your overall fitness. Plus, it’s a great way to train for a race, marathon, or other sporting events.[20]
-
3Turn the knob to the left to decrease the resistance. If you find it so hard to pedal that your hips are shifting on the seat or that your upper body is swaying, turn the knob to the left to make it easier to pedal.[21] If the resistance knob is a lever, lift it up a few notches until it feels like less of a challenge.[22]
- If you're just starting out, keep the resistance relatively low to build up your endurance.
- On some bikes, even the first few levels are meant to mimic a flat riding surface.
- Any resistance setting that allows you to pedal comfortably between 80 and 110 RPMs is a good level.
Expert Q&A
-
QuestionHow can I make my spin bike more comfortable?
 Kyle KennyKyle Kenny is a Master Trainer, Certified Personal Trainer, and the Owner of KennyTRY Training. With more than seven years of experience, he specializes in helping people achieve their fitness goals by creating individualized meal programs, training regimens, supplementation systems, vitamin lists, and workouts. Kyle has multiple Personal Training Certifications and a Fitness Nutrition Specialist Certification through the National Academy of Sports Medicine.
Master Trainer & Certified Personal Trainer Strike a balance with your knee as you adjust the bike. You don't want your knee locked, but you also don't want it fully extended—bending it at a 25-30 degree angle at the end of the pedal stroke is a good goal to aim for.
 -
QuestionHow much resistance do I need on a spin bike?
 Kyle KennyKyle Kenny is a Master Trainer, Certified Personal Trainer, and the Owner of KennyTRY Training. With more than seven years of experience, he specializes in helping people achieve their fitness goals by creating individualized meal programs, training regimens, supplementation systems, vitamin lists, and workouts. Kyle has multiple Personal Training Certifications and a Fitness Nutrition Specialist Certification through the National Academy of Sports Medicine.
Master Trainer & Certified Personal Trainer Choose high resistance if you want a tougher workout. Raising the resistance means you'll be pushing a lot harder, having a higher heart rate, and burning more calories.
 -
QuestionWhat resistance should I set my stationary bike to?
 Kyle KennyKyle Kenny is a Master Trainer, Certified Personal Trainer, and the Owner of KennyTRY Training. With more than seven years of experience, he specializes in helping people achieve their fitness goals by creating individualized meal programs, training regimens, supplementation systems, vitamin lists, and workouts. Kyle has multiple Personal Training Certifications and a Fitness Nutrition Specialist Certification through the National Academy of Sports Medicine.
Master Trainer & Certified Personal Trainer Set your resistance to a low level if you want a lower impact workout. You won't burn as many calories, but it's easier to manage than a high resistance workout.
Warnings
- Never try to adjust the seat’s height or aft/forward position while you’re sitting on it.⧼thumbs_response⧽
- Always use the emergency brake to stop the wheel from spinning before you get off the bike. Otherwise, the pedals might whip around and hit your ankles or lower legs.[24]⧼thumbs_response⧽
- Avoid taking high-intensity spin classes if you’re a beginner because overworking your muscles can lead to injuries, muscle damage, and, in rare cases, a potentially fatal condition called rhabdomyolysis.[25]⧼thumbs_response⧽
- If you have a spin bike at home, keep children and pets away from it because the spinning wheel could injure them if they touch it or get too close.[26]⧼thumbs_response⧽
References
- ↑ https://www.health.harvard.edu/blog/spinning-heart-joints-2018022413237
- ↑ https://youtu.be/csNeUKYBW0E?t=61
- ↑ https://youtu.be/qhnWJ4G5JMA?t=21
- ↑ https://youtu.be/csNeUKYBW0E?t=67
- ↑ Kyle Kenny. Master Trainer & Certified Personal Trainer. Expert Interview. 2 November 2021.
- ↑ https://youtu.be/csNeUKYBW0E?t=98
- ↑ https://youtu.be/qhnWJ4G5JMA?t=89
- ↑ https://www.glamour.com/gallery/5-must-know-tricks-for-positioning-your-spin-bike
- ↑ https://youtu.be/csNeUKYBW0E?t=146
- ↑ https://youtu.be/qhnWJ4G5JMA?t=65
- ↑ https://youtu.be/csNeUKYBW0E?t=214
- ↑ https://images-na.ssl-images-amazon.com/images/I/A1NT1QEuuNS.pdf
- ↑ https://youtu.be/hnm-3Bq9k0s?t=12
- ↑ https://images-na.ssl-images-amazon.com/images/I/A1NT1QEuuNS.pdf
- ↑ https://youtu.be/qhnWJ4G5JMA?t=161
- ↑ https://images-na.ssl-images-amazon.com/images/I/A1NT1QEuuNS.pdf
- ↑ https://images-na.ssl-images-amazon.com/images/I/A1NT1QEuuNS.pdf
- ↑ Kyle Kenny. Master Trainer & Certified Personal Trainer. Expert Interview. 2 November 2021.
- ↑ https://images-na.ssl-images-amazon.com/images/I/A1NT1QEuuNS.pdf
- ↑ Kyle Kenny. Master Trainer & Certified Personal Trainer. Expert Interview. 2 November 2021.
- ↑ Kyle Kenny. Master Trainer & Certified Personal Trainer. Expert Interview. 2 November 2021.
- ↑ https://spinning.com/back-basics-cadence-ranges-resistance-levels-common-corrections-every-instructor-know
- ↑ https://youtu.be/qhnWJ4G5JMA?t=133
- ↑ https://www.360fitnesssuperstore.com/pdf/keiser/keiserm3m3i.pdf
- ↑ https://pubmed.ncbi.nlm.nih.gov/27604073/
- ↑ https://www.assh.org/handcare/condition/fractures-in-children
