This article was co-authored by Stephen Cardone and by wikiHow staff writer, Nicole Levine, MFA. Stephen Cardone is the COO of NY Headshots, a New York City-based studio that specializes in shooting and producing headshots for individuals and businesses. Stephen has over four years of professional photography experience and over six years of documentary filmmaking experience. Stephen also works extensively as a photographer at NY Headshots. His work includes events, environmental photography, as well as headshots for actors, models, and corporate. He holds a BA in Non-fiction Writing from The New School.
The wikiHow Tech Team also followed the article's instructions and verified that they work.
This article has been viewed 564,622 times.
This wikiHow teaches you how to watermark your photos with custom text. Watermarks prevent people from taking credit for your photos. You can add a watermark for free by using the uMark Online website, or by using Microsoft PowerPoint on your Windows or Mac computer.
Steps
Using uMark Online
-
1Go to https://www.umarkonline.com in your web browser. This is the free online version of uMark, a downloadable watermark app. You can use this tool on any computer, phone, or tablet.
-
2Click the Choose File button. It's the grey button at the top of the page. This opens your computer, phone, or tablet's file picker.Advertisement
-
3Select the photo you want to watermark. Navigate to the folder that contains your photo, then click or tap the photo to select it.
-
4Click Open. It's in the bottom-right corner of the window.
-
5Click the Upload button. This blue button is to the right of the photo's name. This uploads your photo to uMark.
-
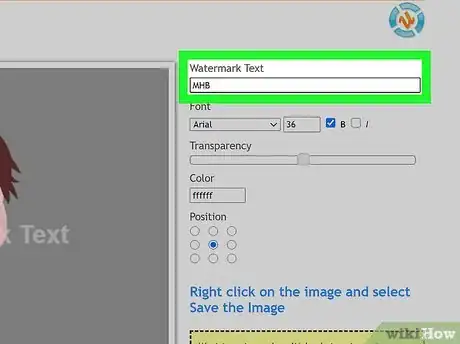
6Enter your watermark's text. Type the text that you want your watermark to display (e.g., your name) into the "Watermark Text" field in the upper-right side of the page.
- You can also change the font, size, and formatting in the "Font" section directly below this.
-
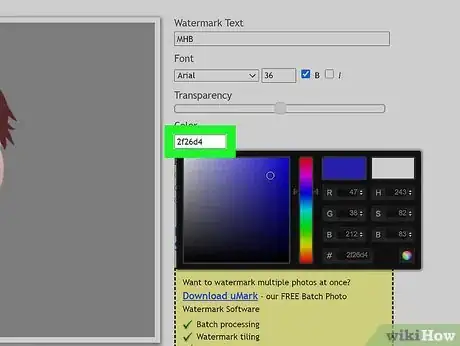
7Change your watermark's color. Click the text field below the "Color" heading, then click a color in the drop-down menu that you want to use.
- You can change the color's gradient in the far-right side of the drop-down menu as well.
-
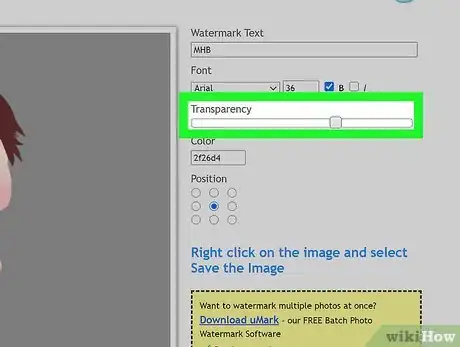
8Change your watermark's transparency. Click and drag the "Transparency" switch right to decrease your watermark's visibility, or drag it left to increase the visibility.
-
9Position your watermark on the image. Click one of the circles in the three-by-three grid below the "Position" heading to change the watermark's position on the picture.
-
10Save the watermark. If you're using a computer, right-click the photo, and then click Save image as. If you're using a phone or tablet, tap and hold the photo, and then select the option to save it.
- If your computer doesn't have distinct left and right mouse buttons, press the mouse button with two fingers, press the right side of the button, or tap the trackpad with two fingers.
Using PowerPoint
-
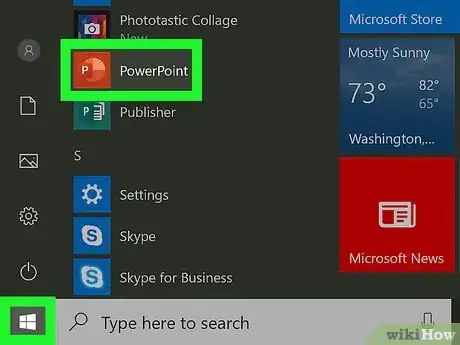
1Open PowerPoint. If you're using Windows, you'll find it in the Start menu in a folder called "Microsoft Office." If you're on a Mac, you'll find it on your Launchpad and in the Applications folder.
-
2Click Blank Presentation. It's in the upper-left side of the PowerPoint home page. A new presentation will open.[1]
- Skip this step on Mac.
-
3Delete anything on the slide. The slide must be blank to create a watermark. Press Control + A (PC) or Command + A (Mac) to select the slide's text boxes, then press the Delete key.
-
4Click the Insert tab. This tab is at the top of the PowerPoint window. A toolbar will appear just below the tab.
-
5Click Pictures. It's in the "Images" section of the toolbar.
- On Mac, after clicking Pictures select Picture From File.
-
6Select a photo and click Insert. This places the image onto the slide.
-
7Click WordArt. It's in the "Text" section of the toolbar at the top of PowerPoint. An assortment of letter styles will appear.[2]
- If you don't see this option, you may have to click the Image tab at the top of the screen once more.
-
8Select a text style. Once you make your selection, you'll see a new text box containing the words "Your Text Here."
-
9Drag the text to the place you'd like the watermark to appear. To do this, hold the mouse cursor over the dotted text box line until it turns into crosshairs, then click and drag the box to the desired position. You can also resize your text box by clicking and dragging one of the squares on an edge or corner of the text box.
-
10Enter your watermark's text. Click the sample text inside the text box to select it, and then type the name, brand, or phrase that you want to use as your watermark.
-
11Format your text. To customize the color, effects, and transparency of your watermark:
- Click the Drawing Tools tab at the top of the screen. If you don't see this tab, click the Format tab.
- Locate the "WordArt Styles" section of the toolbar at the top of the screen, and then click the small square with a rectangle at its bottom-right corner. A panel will expand on the right.
- Click the Text Fill & Outline option (the large A with a solid underline) in the right panel. If you don't see this, click the Text Options tab first.
- Click the Text Fill option to expand it.
- Select the color you want, and then set the Transparency slider to about 80%.
- To edit the outline of your text, expand the Text Outline section, select your color and style, and then increase the transparency to the same level as you did your text.
- Use the other icons at the top of the right panel to edit other aspects of your text, such as adding glowing or 3-D effects.
-
12Select all of the items on the slide. To do this, press Ctrl + A (PC) or Command + C (Mac).
-
13Click the Picture Tools tab. It's at the top of PowerPoint,
-
14Click the Group menu. It's in the "Arrange" section of the Picture Tools tab.
-
15Click Group on the menu. Once the objects are grouped, your watermarked image can be saved.
-
16Save your photo. Right-click the photo and select Save as Picture in the menu. Select a location and then click Save. Your watermarked photo will be saved to the selected location.
- If your computer doesn't have distinct left and right mouse buttons, press the mouse button with two fingers, press the right side of the button, or tap the trackpad with two fingers.
Expert Q&A
-
QuestionWhat program should I use to add watermarks to my photographs?
 Stephen CardoneStephen Cardone is the COO of NY Headshots, a New York City-based studio that specializes in shooting and producing headshots for individuals and businesses. Stephen has over four years of professional photography experience and over six years of documentary filmmaking experience. Stephen also works extensively as a photographer at NY Headshots. His work includes events, environmental photography, as well as headshots for actors, models, and corporate. He holds a BA in Non-fiction Writing from The New School.
Professional Photographer If you're looking for a free program, use Preview if you have a Mac, or Adobe Acrobat on Windows. Use the text tool and opacity slider to add the watermark.
 -
QuestionMy computer is not letting me download due to the firewall. Will I catch any virus if I go ahead?
 Community AnswerIt depends on which program you downloaded. It's a safety net for downloading uncertified programs. If you have a good virus scanner and/or are confident the program isn't a virus, you're safe.
Warnings
- Always have an unwatermarked version of your image saved somewhere else, especially if you plan on selling your image later.⧼thumbs_response⧽
References
About This Article
1. Go to https://www.umarkonline.com.
2. Click Chose File.
3. Select a photo and click Open.
4. Click Upload.
5. Enter your watermark text.
6. Edit the look of the watermark.
7. Right-click the image.
8. Click Save Image As.
9. Save the image to your computer.


