This article was co-authored by Mor Levy Volner, IBCLC, RDN. Mor Levy Volner is an International Board Certified Lactation Consultant based in Southern California. She earned a BS in Clinical Nutrition from the University of California, Davis in 2009 and finished her Lactation Consultant course from the University of California, San Diego Extension Program in 2013, which included 300 hours of lactation consulting experience from Kaiser Permanente. She also has an MS in Dietetics/Nutrition from the California State University - Northridge in 2014.
This article has been viewed 238,718 times.
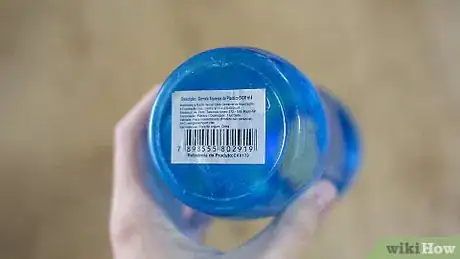
If you’re sterilizing bottles for feeding your baby or other drinking purposes, you have multiple easy options for getting them germ-free. The most popular techniques are using boiling water, a sanitize-certified dishwasher, or the microwave. You can also use bleach if you don’t have access to any of those options. Use these methods for any type of reusable bottle, though if your bottles are plastic, check that they are BPA-free before using any heat option.[1] For the best results, sterilize bottles when they are brand new or borrowed, if someone is sick, if you see buildup on them, or if you don’t have access to safe drinking water.
Steps
Using Boiling Water
-
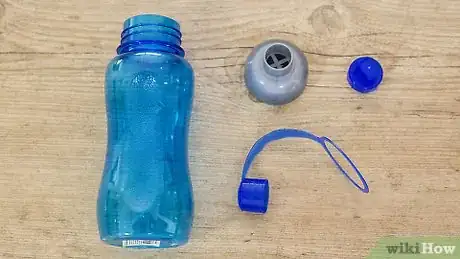
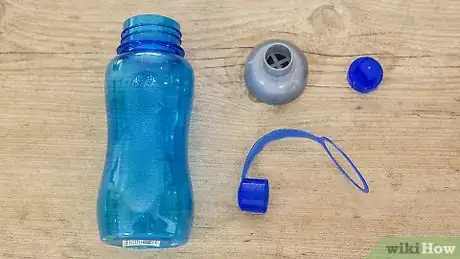
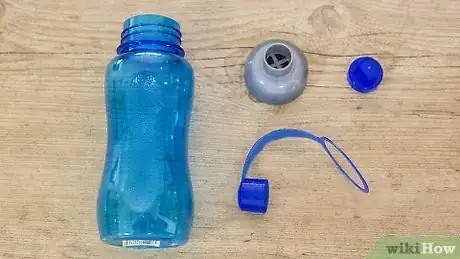
1Take all the pieces of the bottle apart. To ensure that every part of the bottle gets sterilized, disassemble the entire bottle and all its pieces. Not doing this can cause germs to stay in tiny crevices that are then put in your or your baby’s mouth.[2]
-
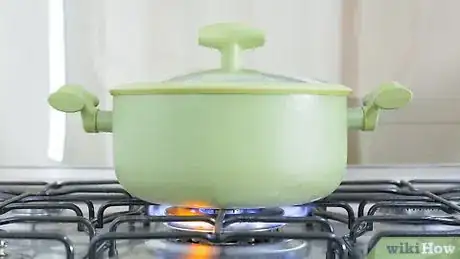
2Fill a pot with water and set it to boil on the stove. Choose a pot of an appropriate size to cover all the pieces you are sanitizing with water. Fill the pot with enough water to cover your bottle pieces and set it on a stove burner, but don’t put the pieces in the pot yet. Turn your burner on high and allow the water to boil.[3]
- To get your water to boil faster, cover the pot with a lid that fits it. Do not put salt or anything else into the water.
-
3Place all the bottle pieces in the boiling water for 5 minutes.[4] Drop all your bottle pieces into the water once it’s boiling. To avoid getting splashed with hot water, try lowering the pieces gently into the water with a spoon or by dropping them with your fingers just above the water’s surface.[5]
- After 5 minutes, turn your stove burner off.
-
4Remove the items with clean tongs and allow them to air-dry. Do not remove the bottle items with your fingers immediately after they’re finished, or you could burn yourself. Use a set of clean tongs or another utensil to remove the pieces from the water. Set them out on a clean towel or drying rack in an area that’s free from dirt and dust to air-dry.[6]
- Don’t rub the bottles dry with a towel or you risk transferring germs to them. Leave the bottle pieces in the clean area until you’re ready to use them. Make sure your hands are clean when you reassemble each bottle before using it.
Sterilizing Bottles in the Dishwasher
-
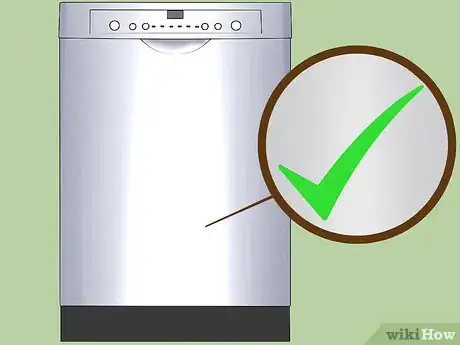
1Check your dishwasher manual for an NSF/ANSI Standard 184 Certification. NSF/ANSI stands for National Sanitation Foundation / American National Standards Institute. Their Standard 184 applies to dishwashers made with an extended hot-water rinse feature that’s designed to kill 99.99 percent of bacteria when the dishwasher is set to the “sanitize” cycle. Review your owner’s manual to make sure your dishwasher has both this certification and a sanitize cycle. [7]
- If your dishwasher doesn’t have this certification and a sanitize cycle, it will not kill as many germs on your items and is not appropriate for sanitizing bottles.
-
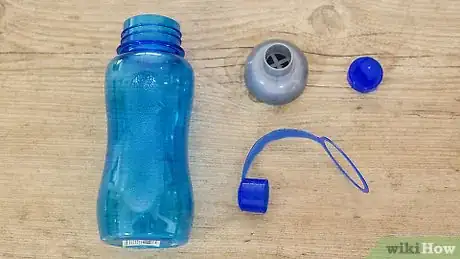
2Disassemble your bottles completely. Take all the pieces of your bottles apart; remove the caps, nipples and any other pieces. You want to make sure germs don’t stay in any tiny crevices of the bottles.[8]
-
3Place the bottles in the top rack of your dishwasher and smaller pieces in a basket. Stand the bottles themselves top-side down in the top rack of your dishwasher. Place the smaller pieces such as the caps or nipples into a dishwasher basket either in the top or bottom rack.[9]
- Don’t leave the smaller pieces on a rack outside of a basket, or they may fall out and onto heating elements in the bottom of the dishwasher and become damaged.
-
4Run your dishwasher on the “sanitize” setting. Put dishwasher detergent in your dishwasher as you normally would. Press the “sanitize” button on the front of your dishwasher and then the “start” button. Allow the dishwasher to do the entire sanitize cycle before removing the bottle items.[10]
- Sanitize cycles in dishwashers sometimes take multiple hours; don’t stop the cycle early, or you risk having bottles that are not sterilized.
-
5Allow the bottle pieces to air-dry. You can leave the bottles in the dishwasher until they’re cool enough to touch; if you do this, don’t open the dishwasher before you’re ready to take them out. If you want to take them out right away, use clean tongs to remove them so you don’t burn your fingers.[11]
- Put the sterilized bottle pieces on a clean towel or drying rack in an area that’s free from dirt and dust until you’re ready to use them.
Using the Microwave
-
1Check that your bottles are microwave-safe if they’re plastic. Glass bottles are fine to microwave, but you’ll want to check the packaging of any plastic bottle you’re using before sterilizing it in a microwave. Somewhere on the packaging it should say “microwave-safe,” or provide you with instructions on using a microwave to sterilize it.[12]
-
2Take all the pieces of the bottles apart. Remove the caps, nipples, and any other pieces to ensure that germs don’t stay in tiny crevices of the bottles. This is the safest practice to ensure that the bottles are completely sterilized and you or your baby don’t ingest any bacteria.[13]
-
3Fill bottles halfway with cold water. Use cold water from your faucet to fill your bottles halfway. The water in the bottles will create steam in the microwave when it’s on. The steam in the microwave sterilizes your bottles.[14]
- Cold water is better to use any time you are heating water, because lead and other chemicals from your pipes are less likely to get into the water as it’s coming through the faucet.
-
4Cover smaller pieces with water in a microwave-safe bowl. Take the smaller pieces, such as caps or nipples, and place them into a bowl. Fill the bowl with enough cold water from your faucet so that all the pieces are completely covered.[15]
-
5Microwave all the items on “high” for 1 ½ minutes. Place the bottles and bowl of pieces into your microwave. Press the “high” button and then set the microwave to be on for 1 minute and 30 seconds. Press the “start” button and wait for the microwave to finish.[16]
-
6Allow the pieces to air-dry. Make sure your hands are clean and remove the bottle pieces from your microwave. Empty all the water from the bottles and bowl, and place the pieces on a clean towel or drying rack in an area that’s free from dirt or dust until you’re ready to use them.[17]
Sterilizing with Bleach
-
1Put 1 tsp (4.9 mL) unscented bleach into 1 US gal (3.8 L) water in a clean wash basin. Use a basin that’s large enough for all your bottle pieces and water to cover them completely. Then take a liquid measuring cup to measure the correct amounts of bleach and water to fill your basin.[18]
-
2Remove the cap, nipple, and all other pieces from your bottles. Disassemble your bottles completely by taking all the pieces apart. This ensures that germs don’t get stuck in tiny crevices in the bottle pieces.[19]
-
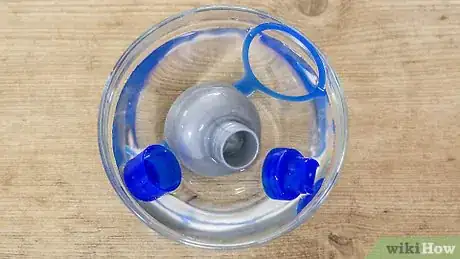
3Submerge all the pieces under bleach water completely for 2 minutes. Place the bottle pieces completely under the solution, checking that all parts of them are completely submerged and there are no air bubbles. If you are sterilizing baby bottles, squeeze the solution through the nipple holes to get it inside the nipples.[20]
-
4Remove the items with clean hands or tongs and allow them to air-dry. Place all the pieces out on a clean towel or dry-rack in an area free from dirt or dust until you’re ready to use them. Don’t rinse them first; doing that will transfer germs back onto them. Any bleach remaining on the items will break down as they dry and not harm you or your baby.[21]
Warnings
- These methods are for reusable bottles only. Don’t attempt to sterilize disposable single-use plastic bottles, such as plastic soda bottles. The heat or bleach will cause chemicals in the plastic to break down and you will ingest them next time you use the bottle.⧼thumbs_response⧽
- Sterilize your bottles when you first get them, if someone in your family is sick, or if the bottles are especially dirty. Other than that, regular washing should be sufficient. Avoid over-sterilizing reusable plastic bottles, as the chemicals in the plastic can break down eventually.⧼thumbs_response⧽
- Stop sterilizing bottles and throw them away if they start showing any signs of damage. Melted, misshapen, or scratched plastic and cracked glass should be thrown away immediately.⧼thumbs_response⧽
- Don’t touch hot bottles with your hands immediately after they are sterilized to avoid burning yourself.⧼thumbs_response⧽
- Sterilize your bottles before every use if you do not have access to safe drinking water. Try to use glass bottles since you should not expose plastic to high heat very often.⧼thumbs_response⧽
References
- ↑ Mor Levy Volner, IBCLC, RDN. International Board Certified Lactation Consultant. Expert Interview. 5 May 2020.
- ↑ https://www.cdc.gov/healthywater/hygiene/healthychildcare/infantfeeding/cleansanitize.html
- ↑ https://www.cdc.gov/healthywater/hygiene/healthychildcare/infantfeeding/cleansanitize.html
- ↑ https://momlovesbest.com/feeding/bottles/sterilize-baby-bottles
- ↑ https://momlovesbest.com/feeding/bottles/sterilize-baby-bottles
- ↑ https://momlovesbest.com/feeding/bottles/sterilize-baby-bottles
- ↑ https://momlovesbest.com/feeding/bottles/sterilize-baby-bottles
- ↑ https://momlovesbest.com/feeding/bottles/sterilize-baby-bottles
- ↑ Mor Levy Volner, IBCLC, RDN. International Board Certified Lactation Consultant. Expert Interview. 5 May 2020.
- ↑ https://momlovesbest.com/feeding/bottles/sterilize-baby-bottles
- ↑ https://momlovesbest.com/feeding/bottles/sterilize-baby-bottles
- ↑ https://momlovesbest.com/feeding/bottles/sterilize-baby-bottles
- ↑ https://momlovesbest.com/feeding/bottles/sterilize-baby-bottles
- ↑ https://momlovesbest.com/feeding/bottles/sterilize-baby-bottles
- ↑ https://www.cdc.gov/healthywater/hygiene/healthychildcare/infantfeeding/cleansanitize.html
- ↑ https://www.cdc.gov/healthywater/hygiene/healthychildcare/infantfeeding/cleansanitize.html
- ↑ https://www.cdc.gov/healthywater/hygiene/healthychildcare/infantfeeding/cleansanitize.html
- ↑ https://www.cdc.gov/healthywater/hygiene/healthychildcare/infantfeeding/cleansanitize.html
About this article
To sterilize bottles with boiling water, start by disassembling all of the bottle pieces. Next, bring a pot of water to a boil on your stove and lower the bottle pieces gently into the water with tongs or a spoon. Let the pieces boil for 5 minutes, then remove them with tongs and place them on a clean towel or drying rack to air-dry. For tips on sterilizing with bleach, read on!

